
eSIM のインストール方法
以下の簡単な手順で EscapeSIM の eSIM をインストール・有効化できます
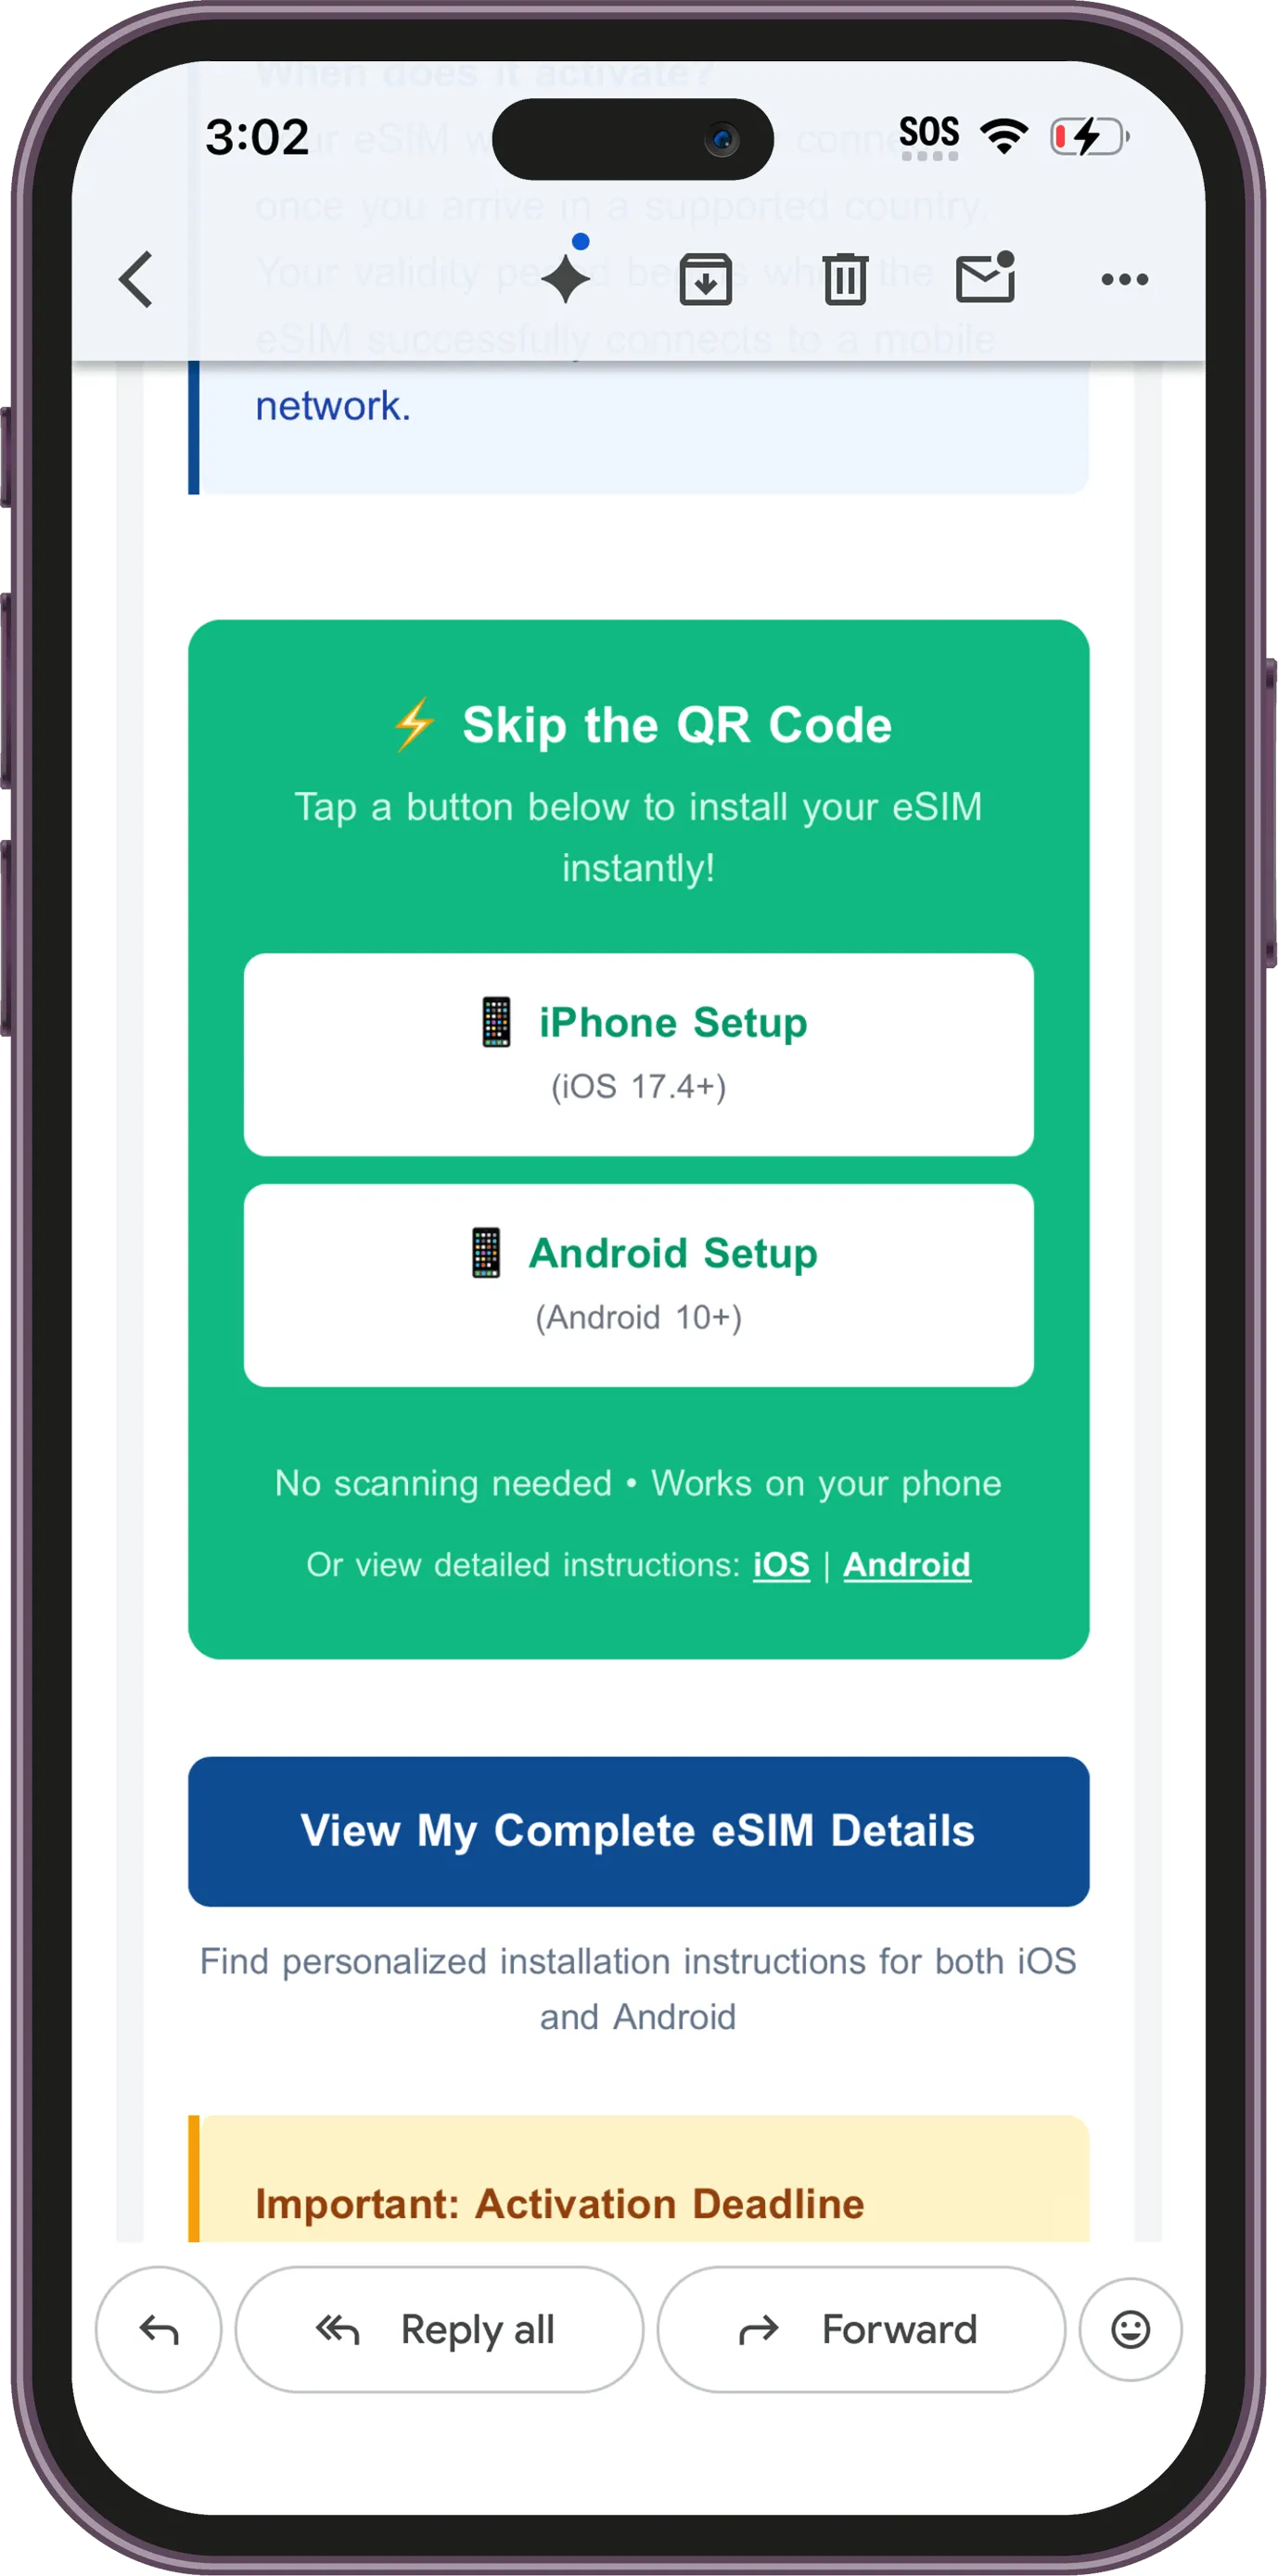
Step 1 / 16
In the email, tap iPhone Setup under Skip the QR Code.
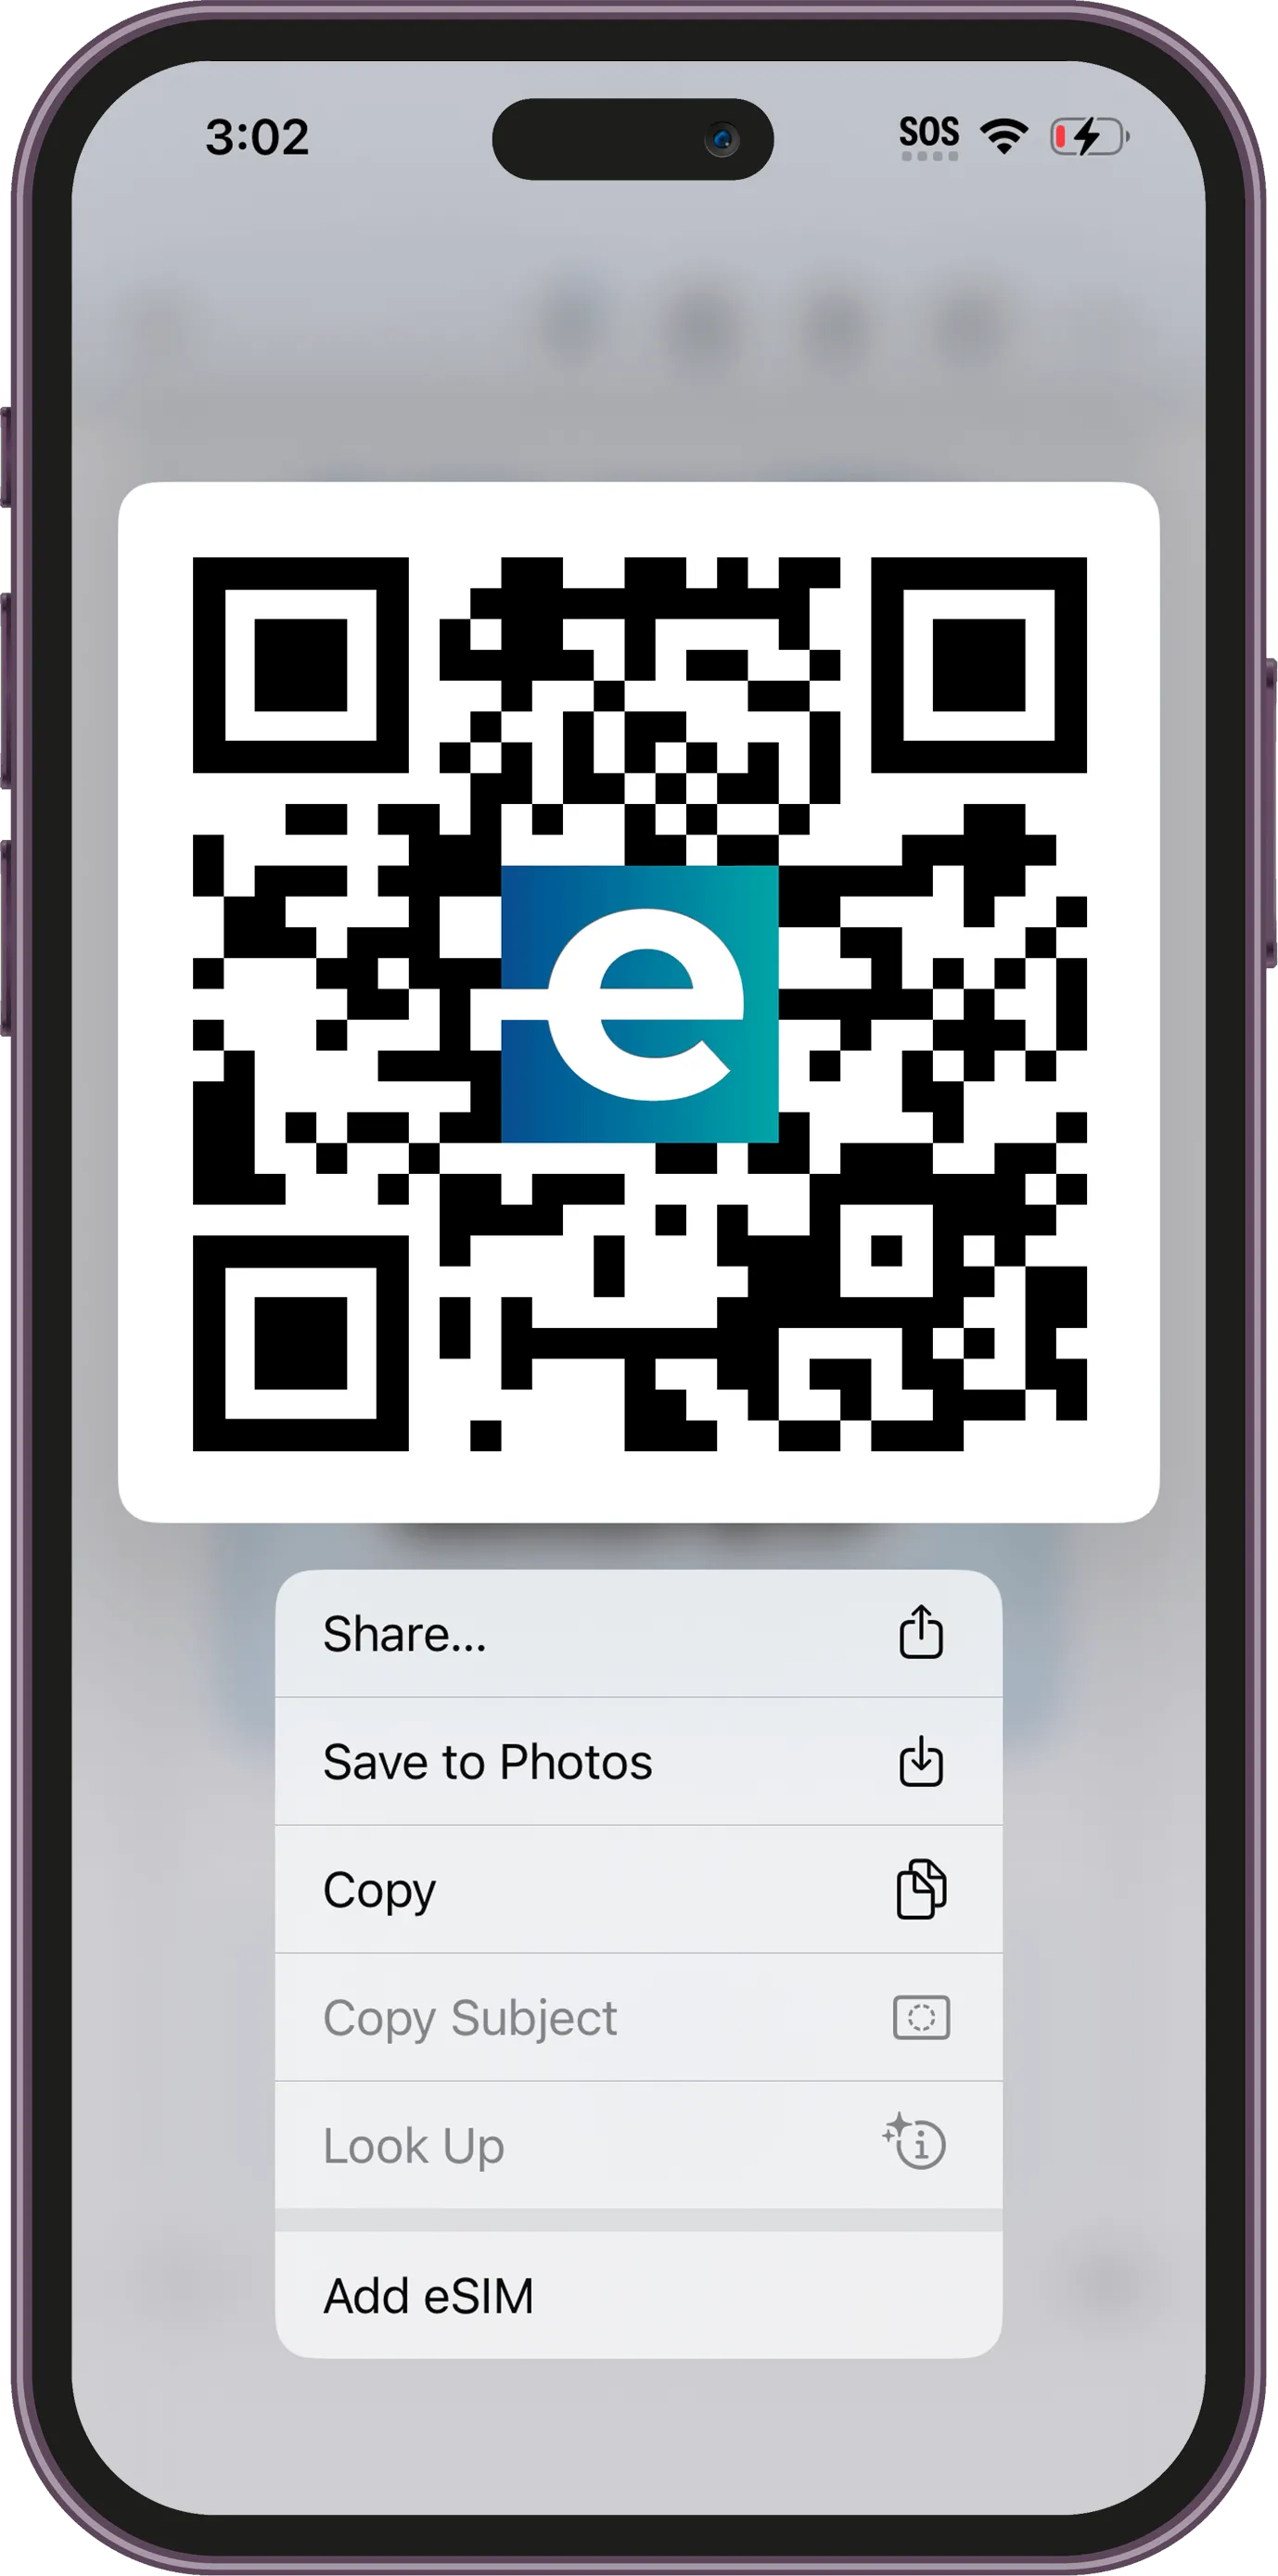
Step 2 / 16
Alternatively, press and hold the QR code in the email and tap Add eSIM.
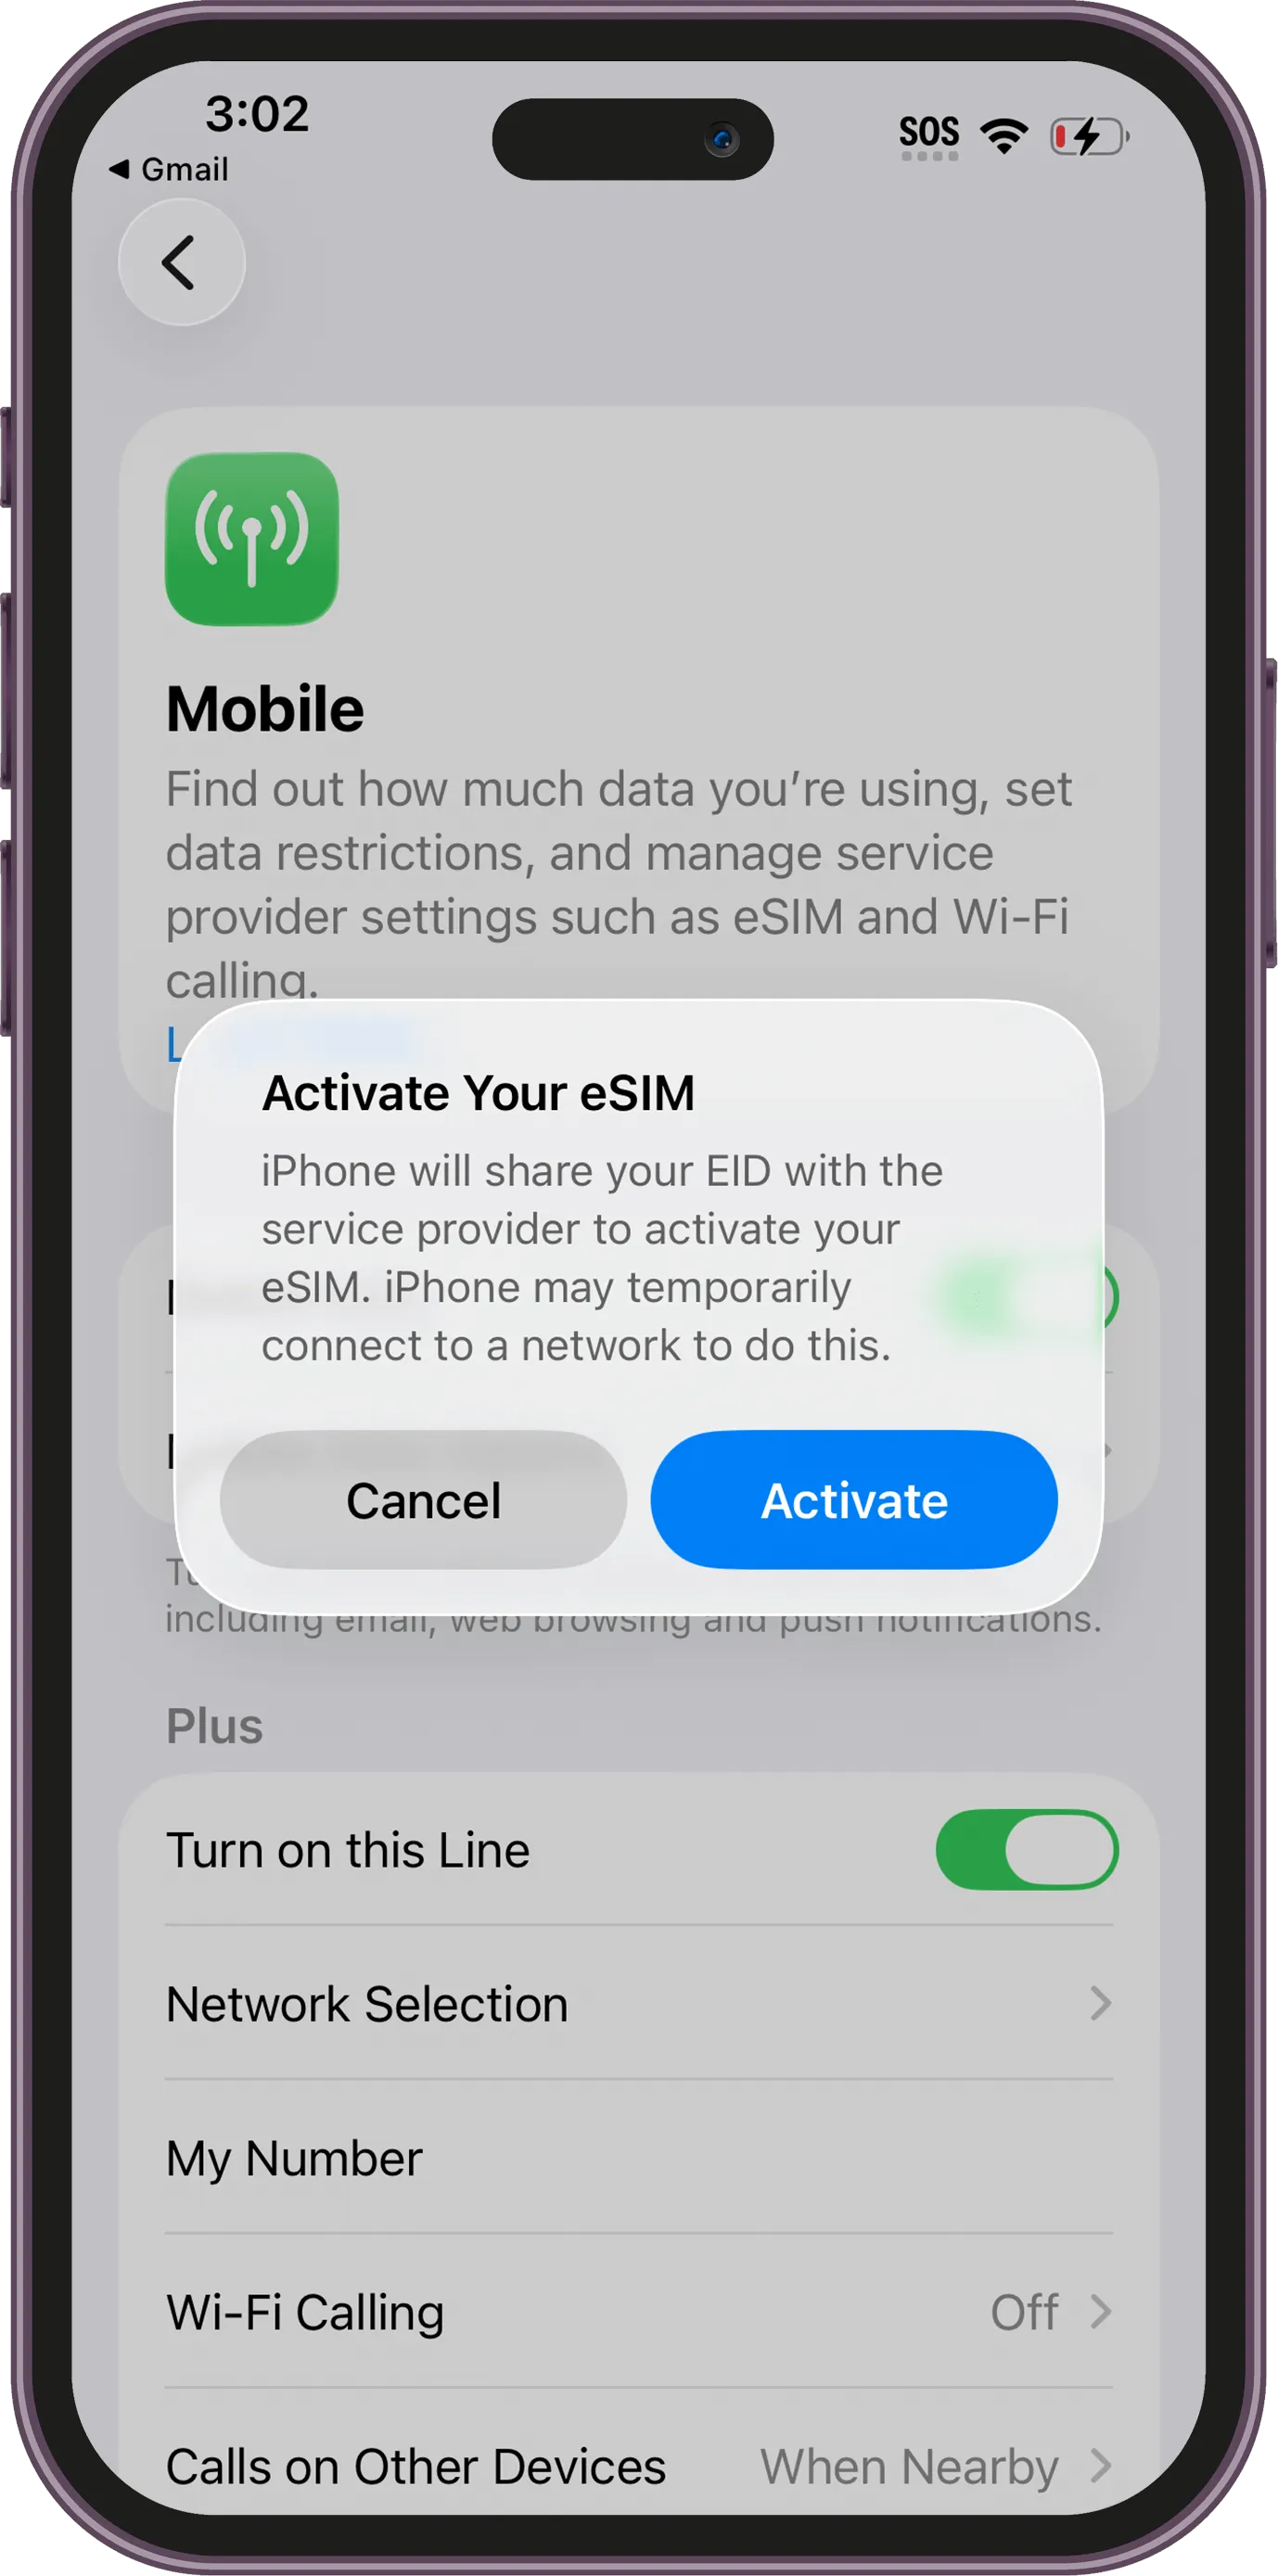
Step 3 / 16
When the Activate Your eSIM prompt appears, tap Activate to begin setup.
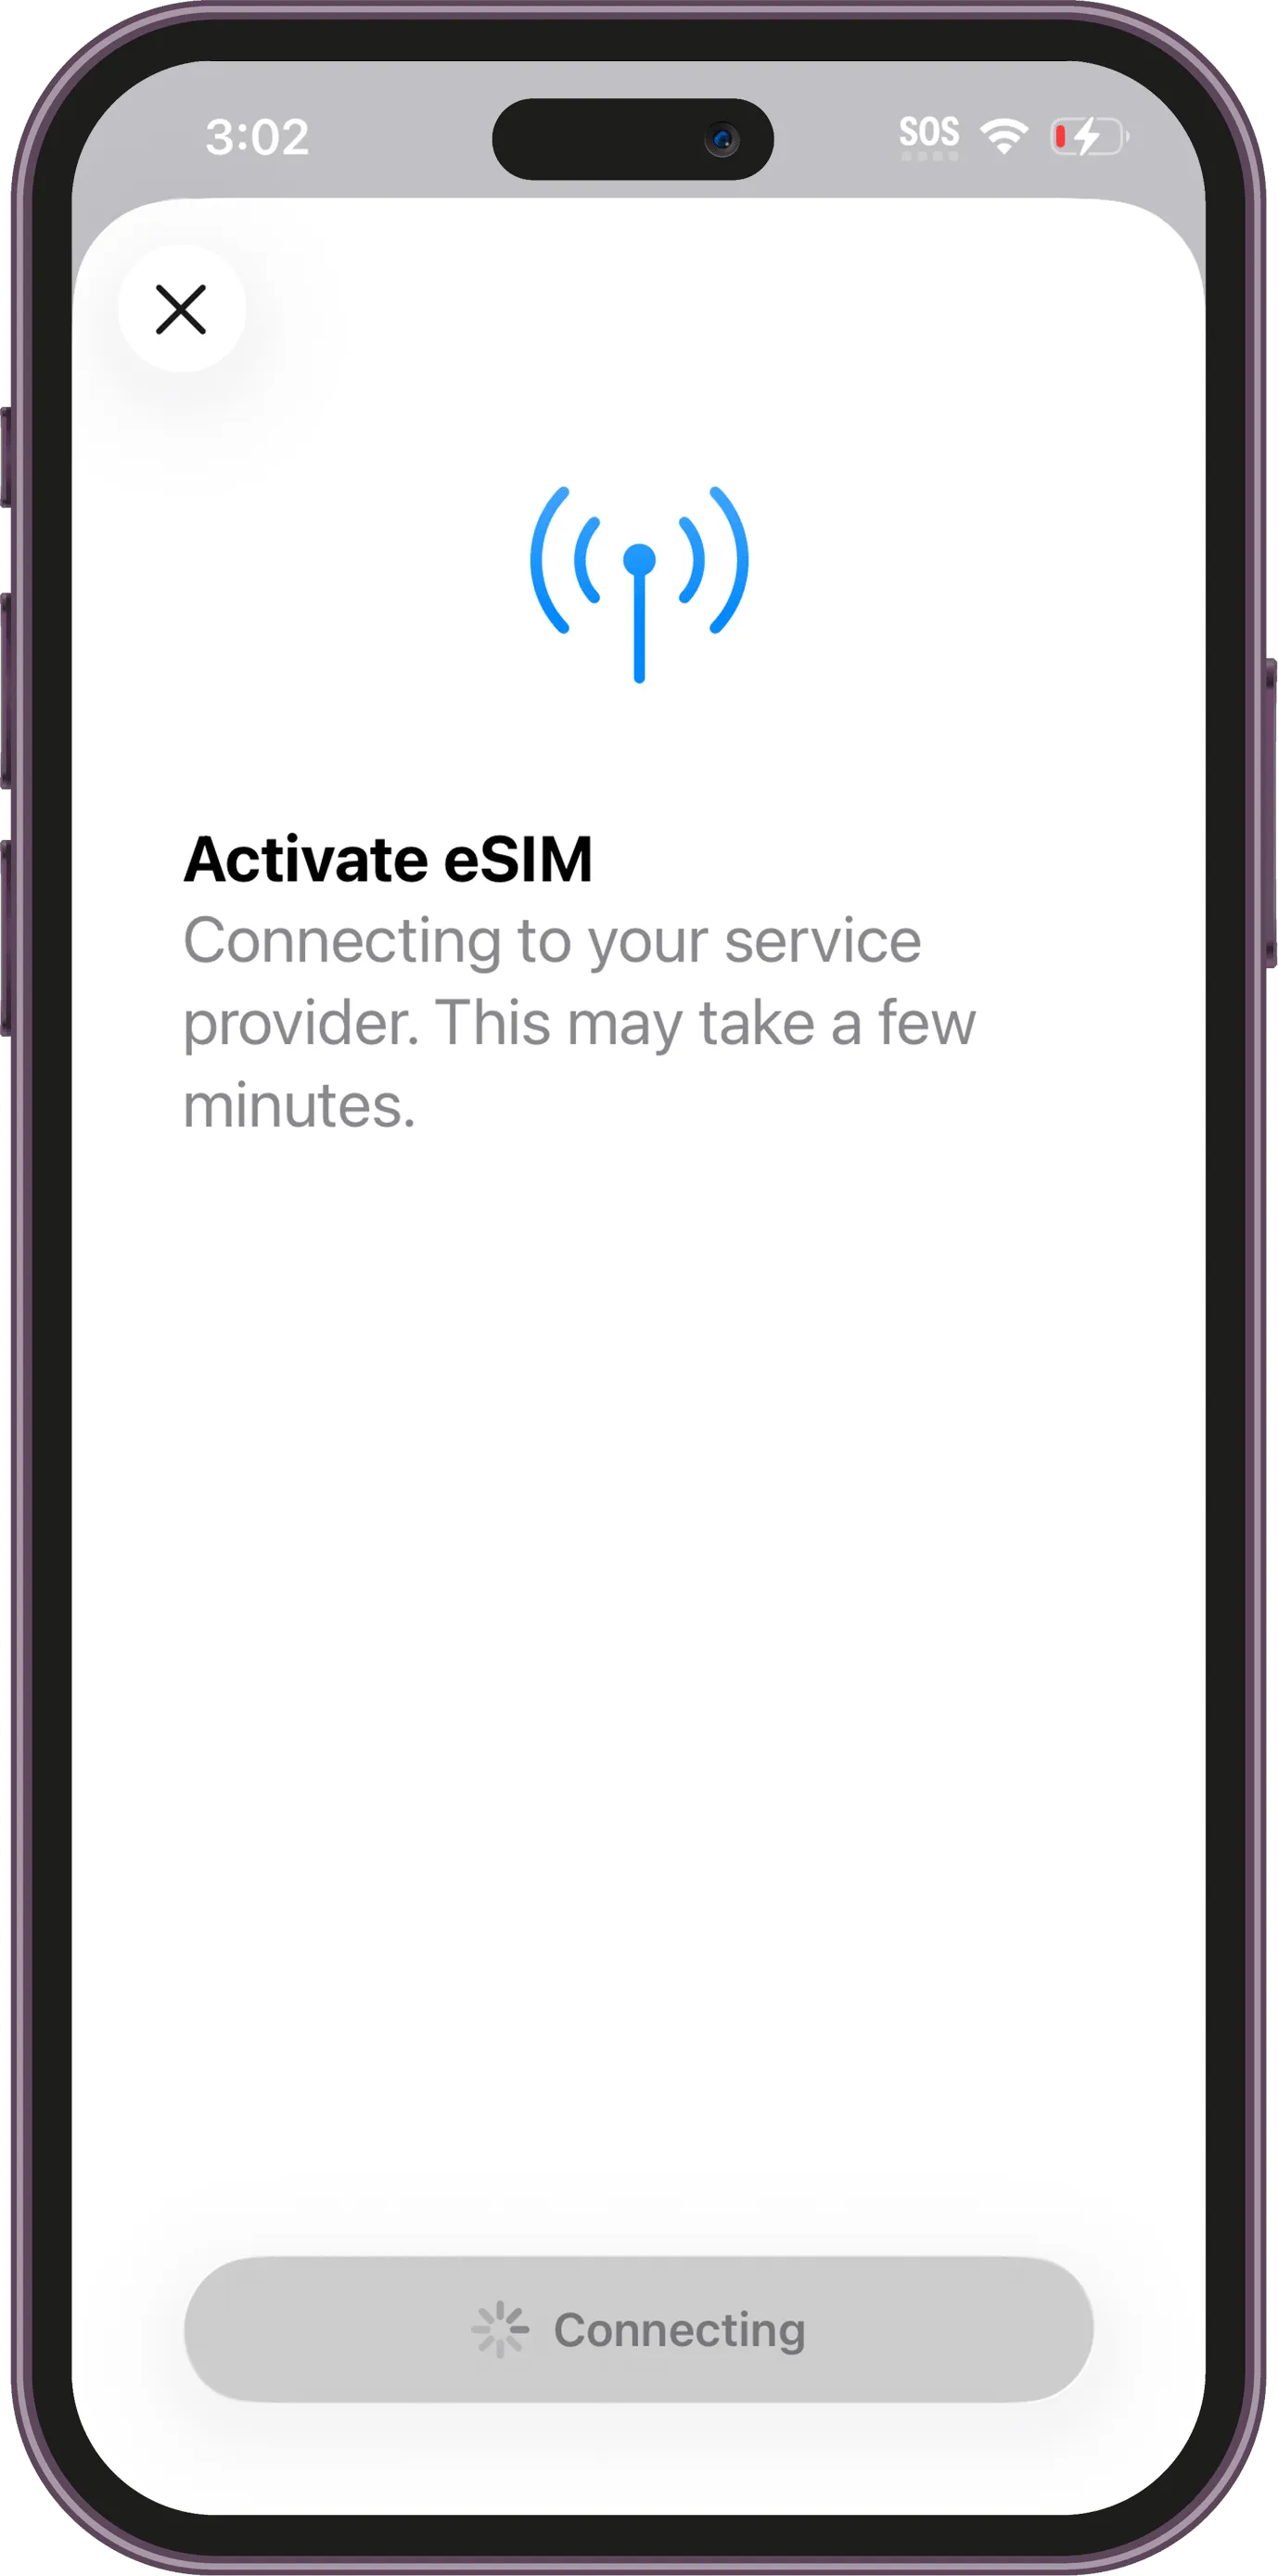
Step 4 / 16
Your iPhone will connect to the service provider. This may take a few minutes.
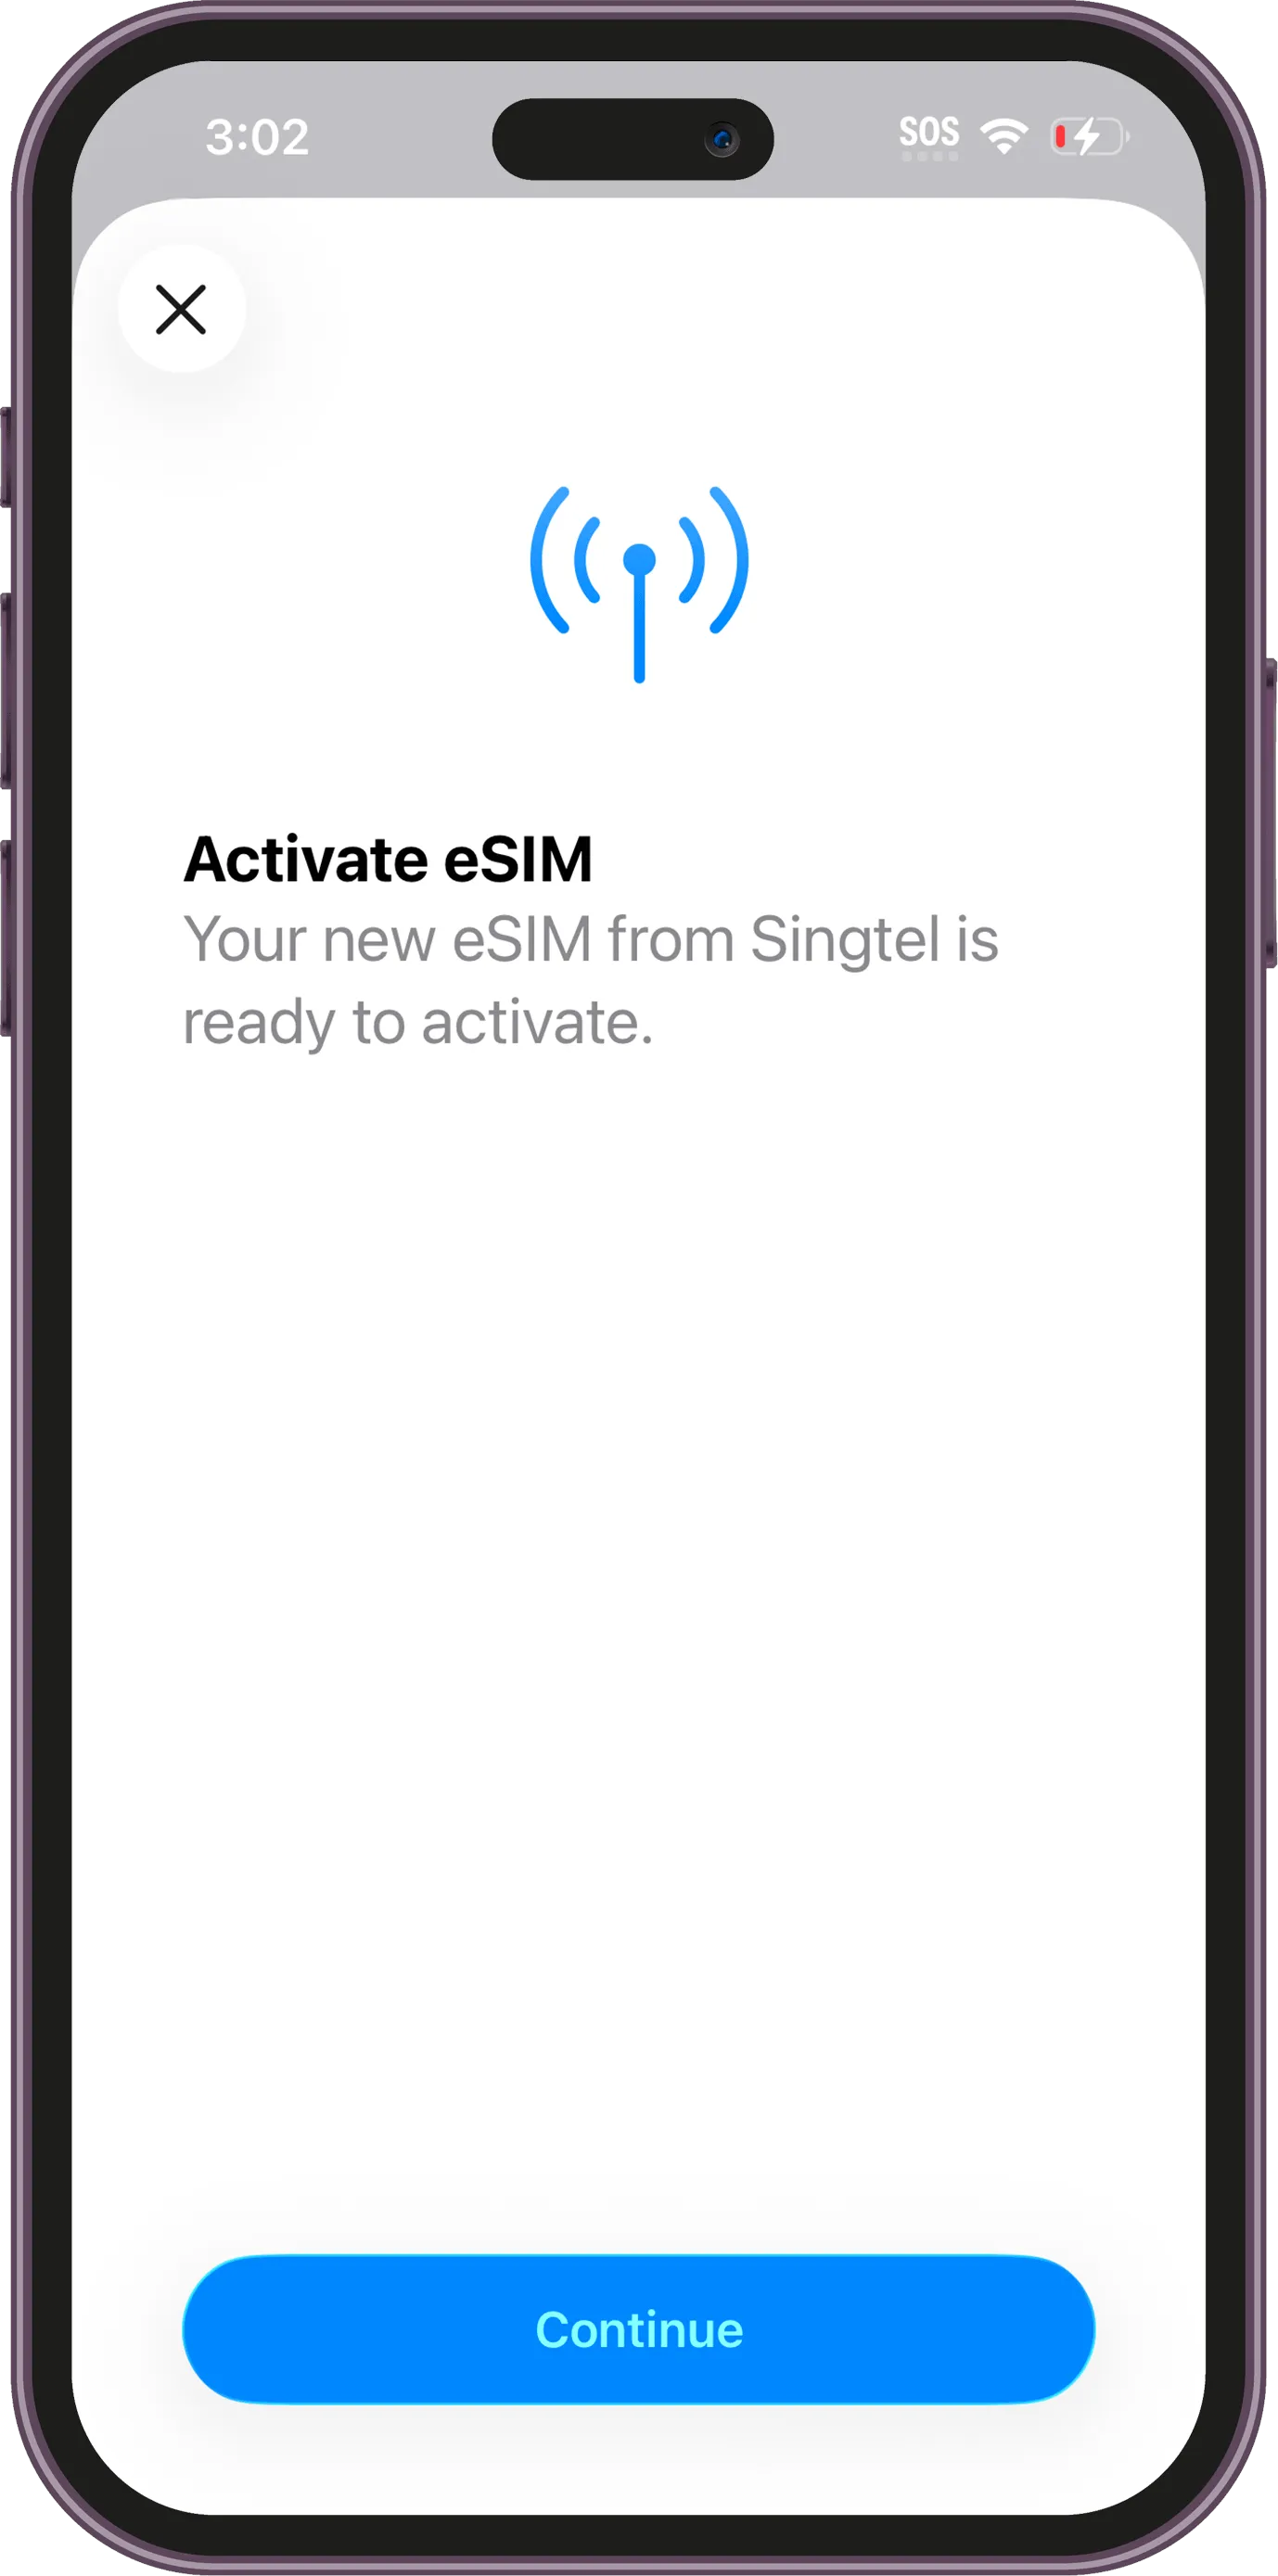
Step 5 / 16
Once your new eSIM is ready, tap Continue.
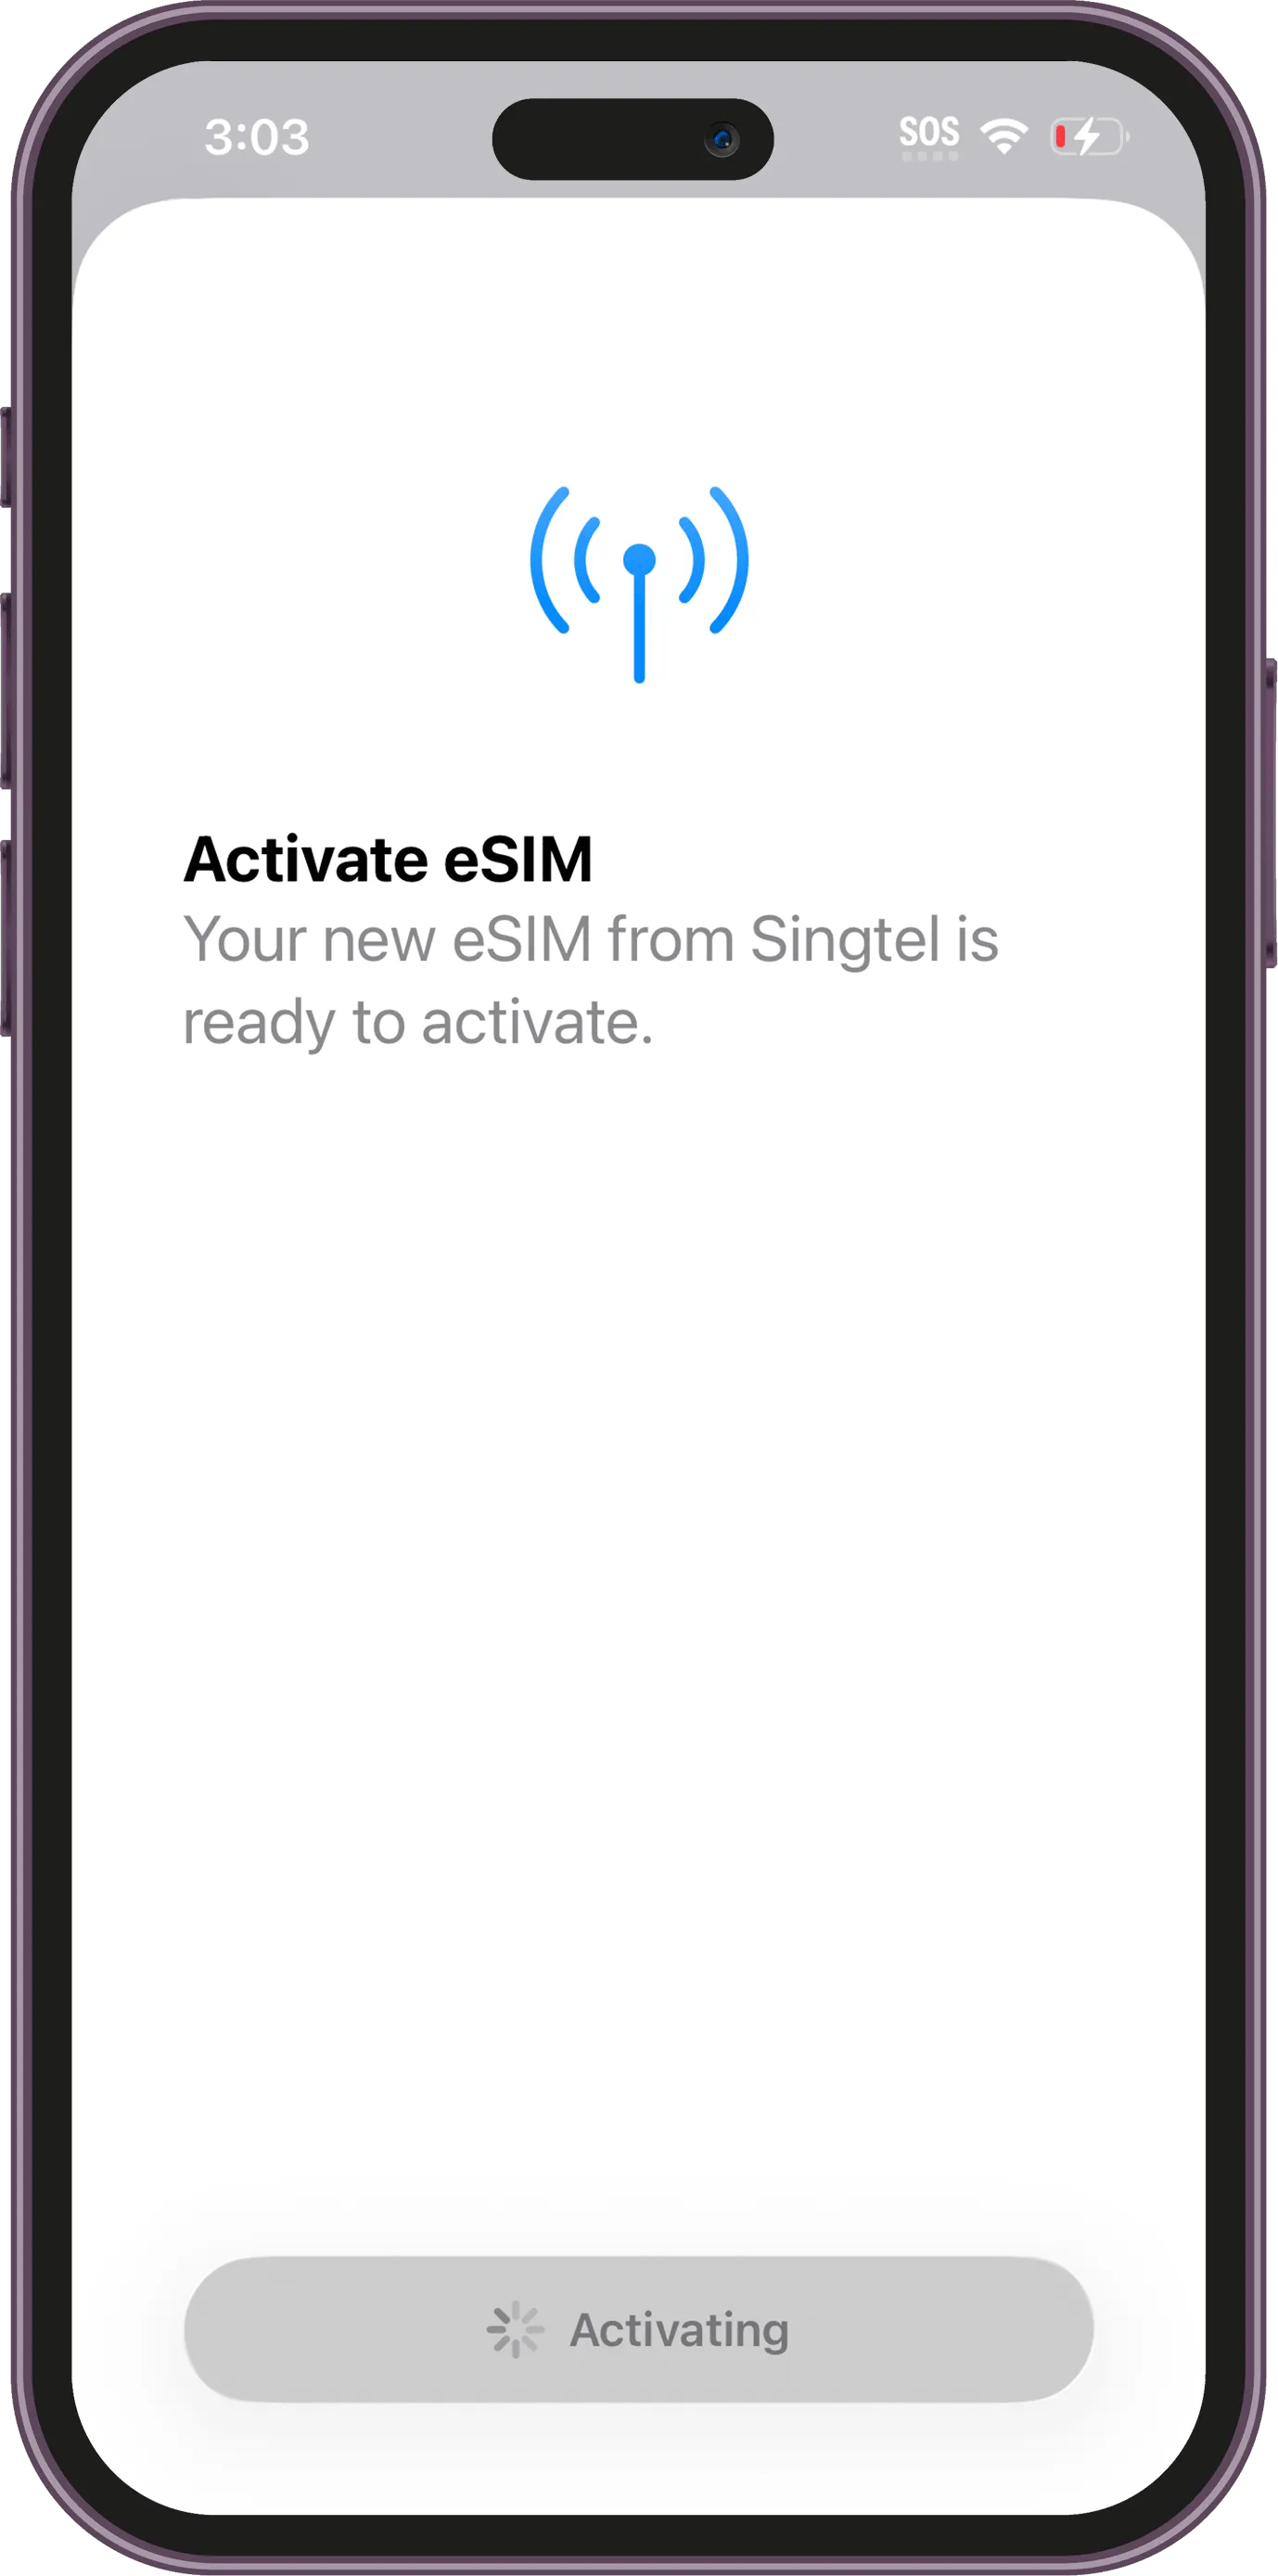
Step 6 / 16
You may have to wait a moment while the eSIM installs on your device *Note - Activation of your plan may not begin from this moment, refer to your plan details for when this occurs
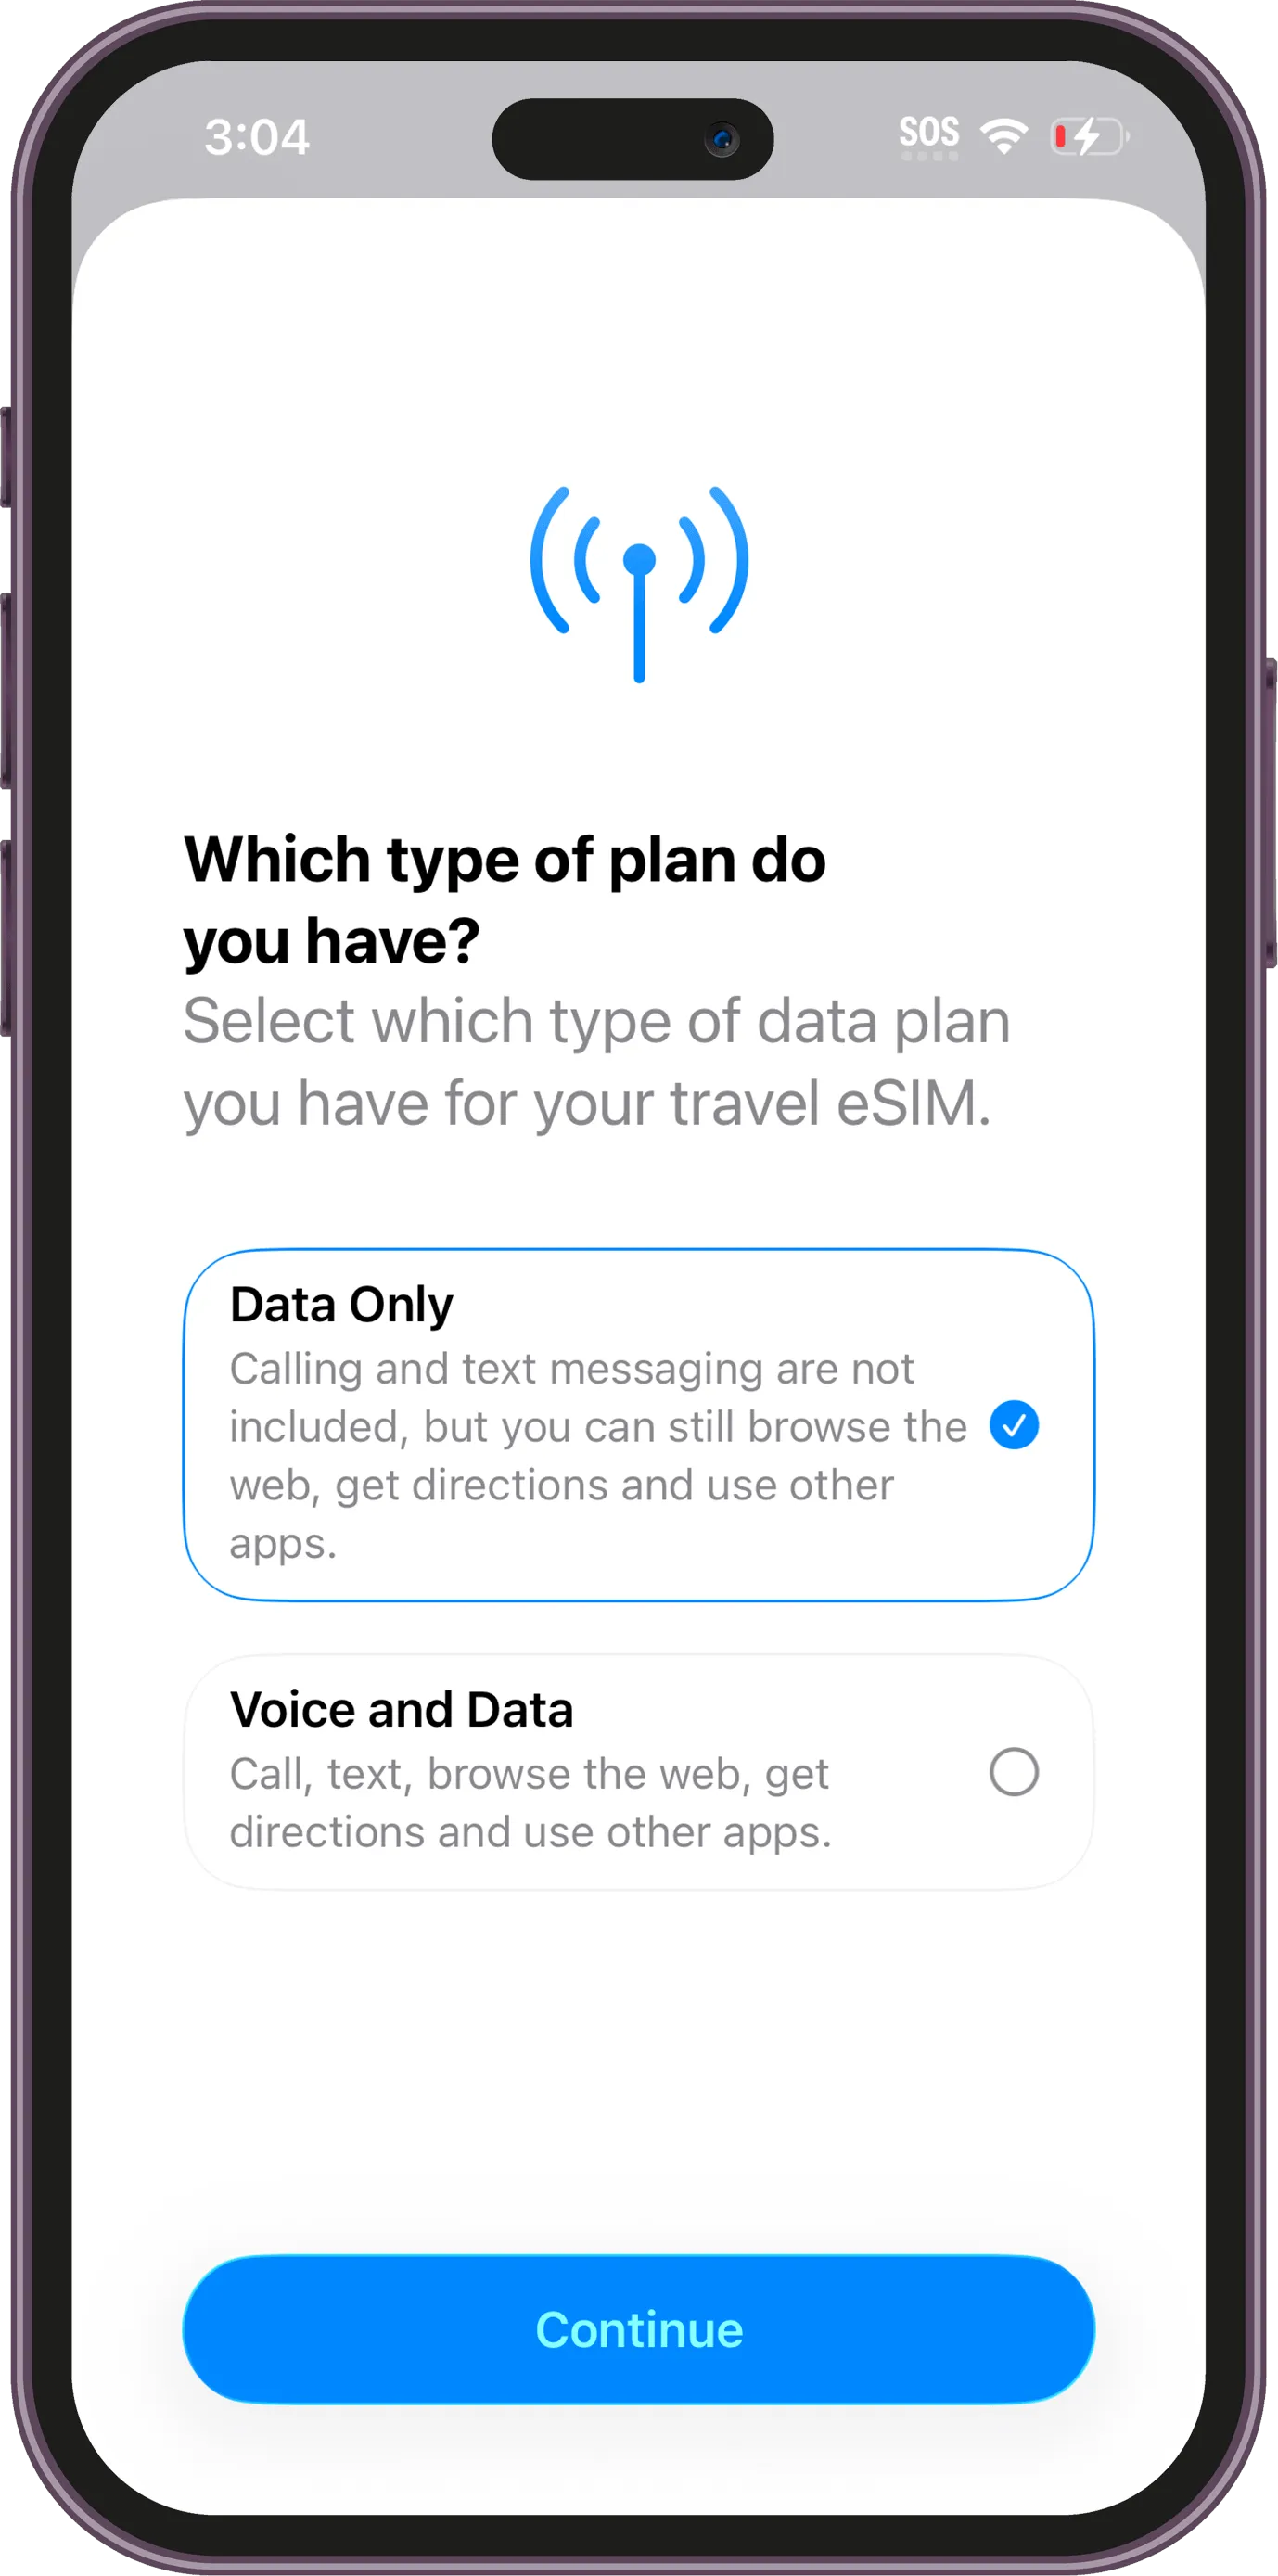
Step 7 / 16
Select Data Only for your travel eSIM plan.
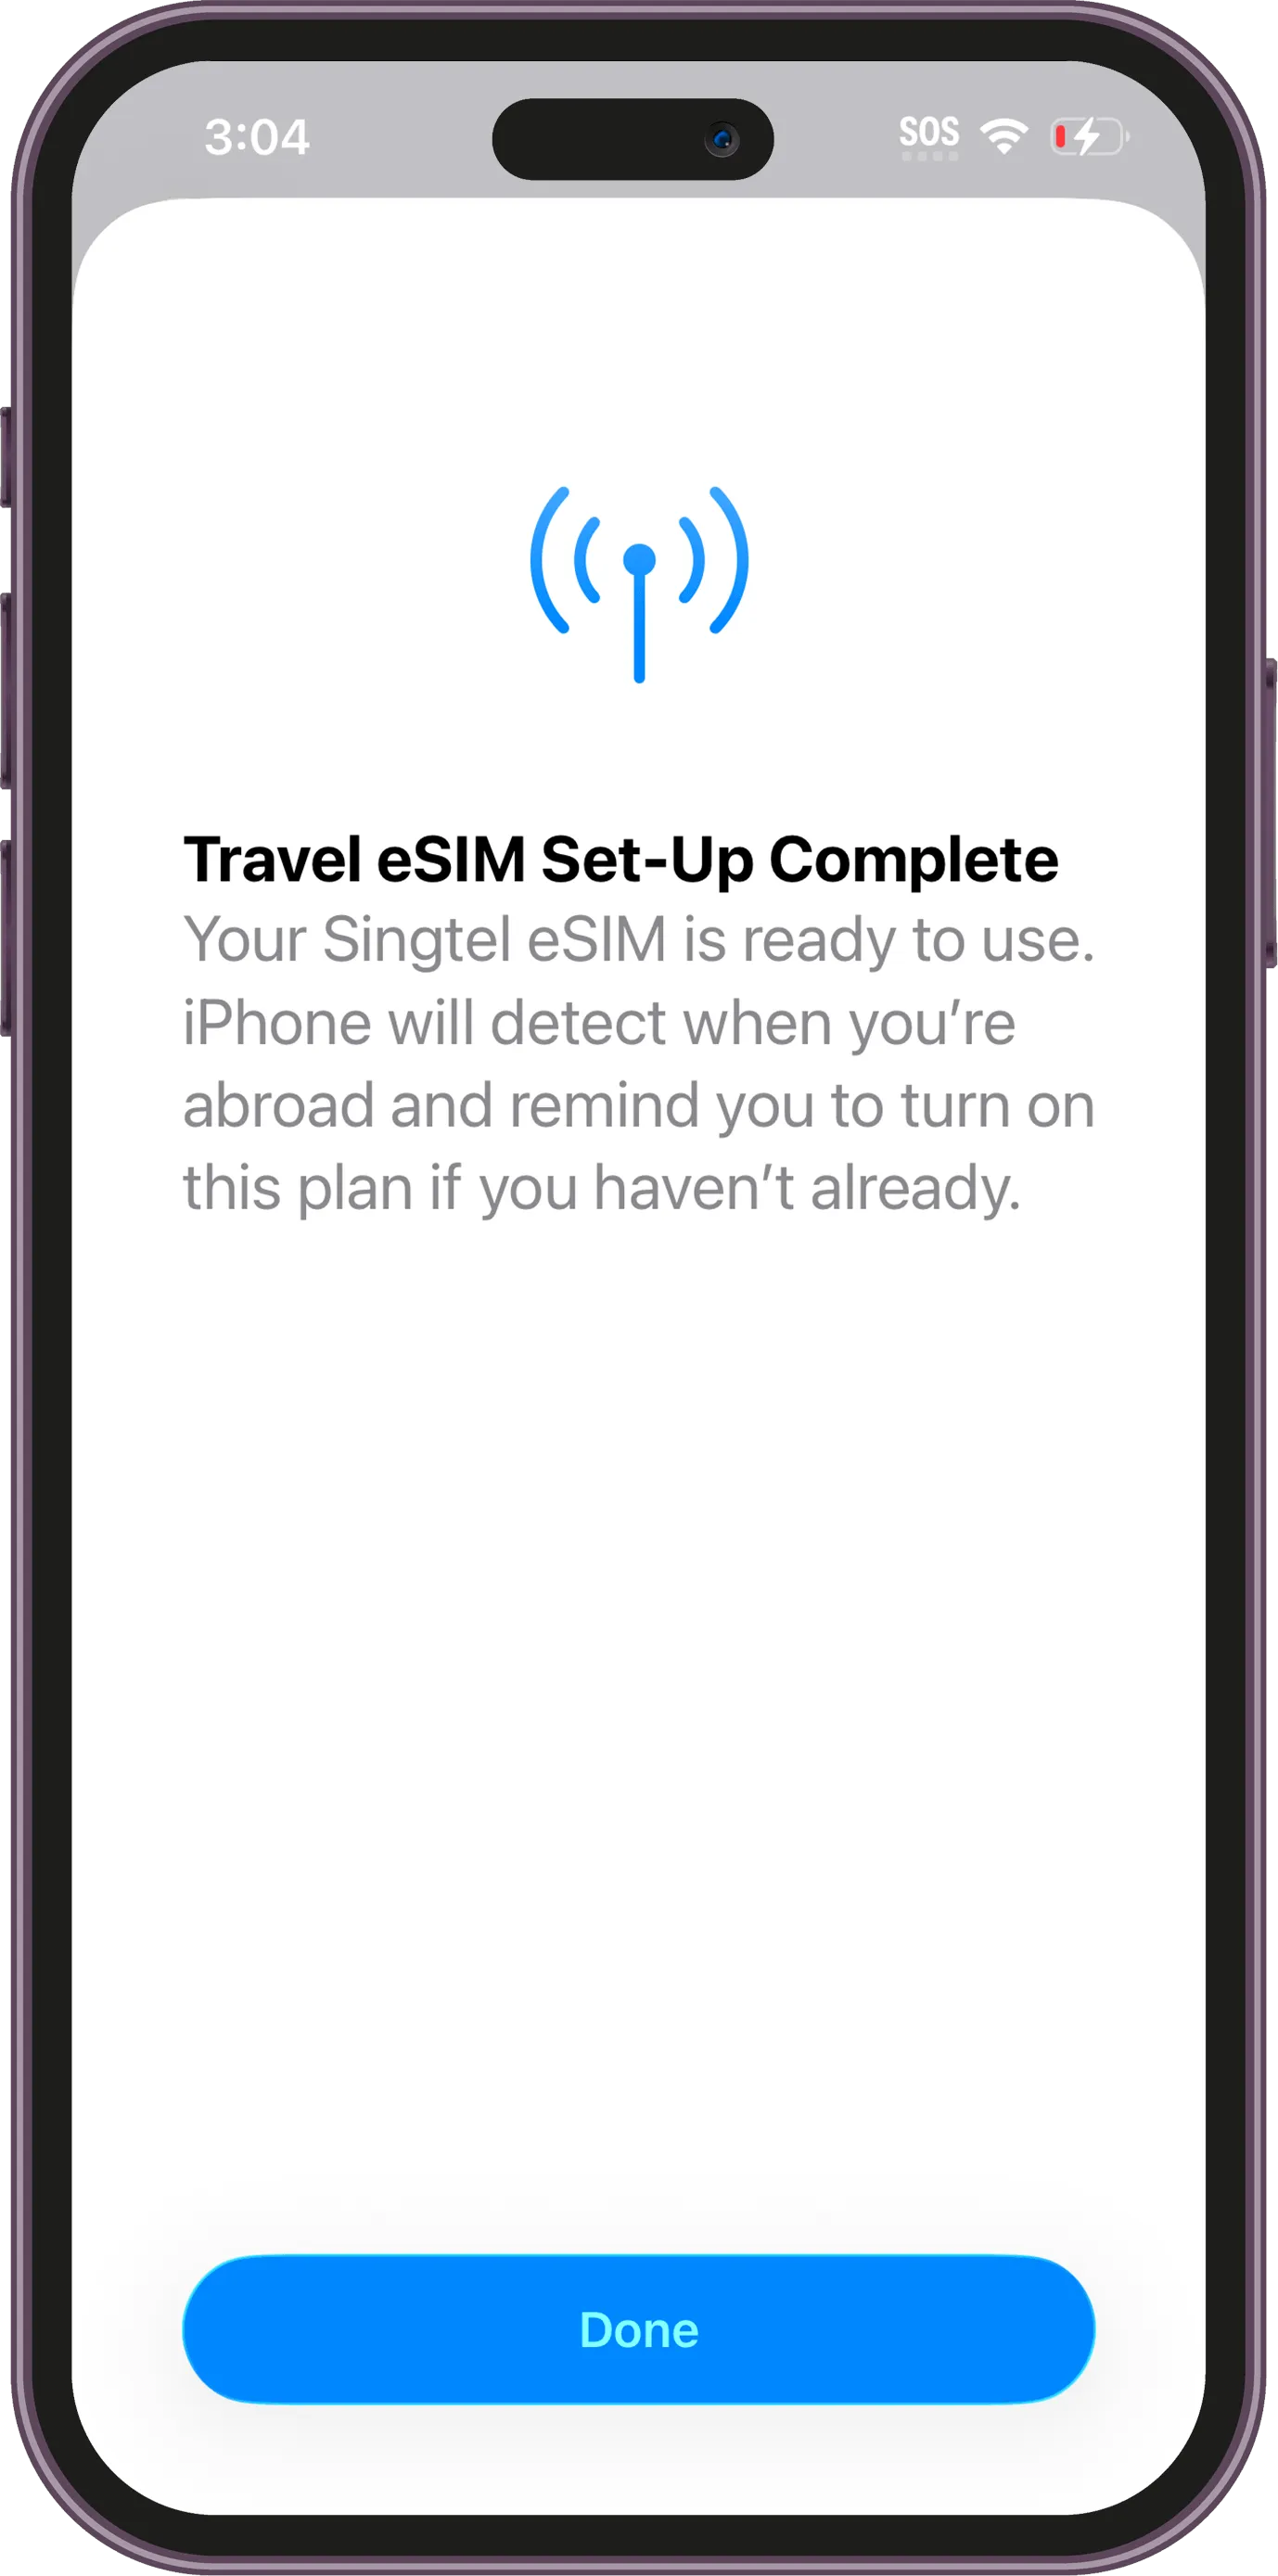
Step 8 / 16
Your travel eSIM has been added successfully. Tap Done to finish setup.
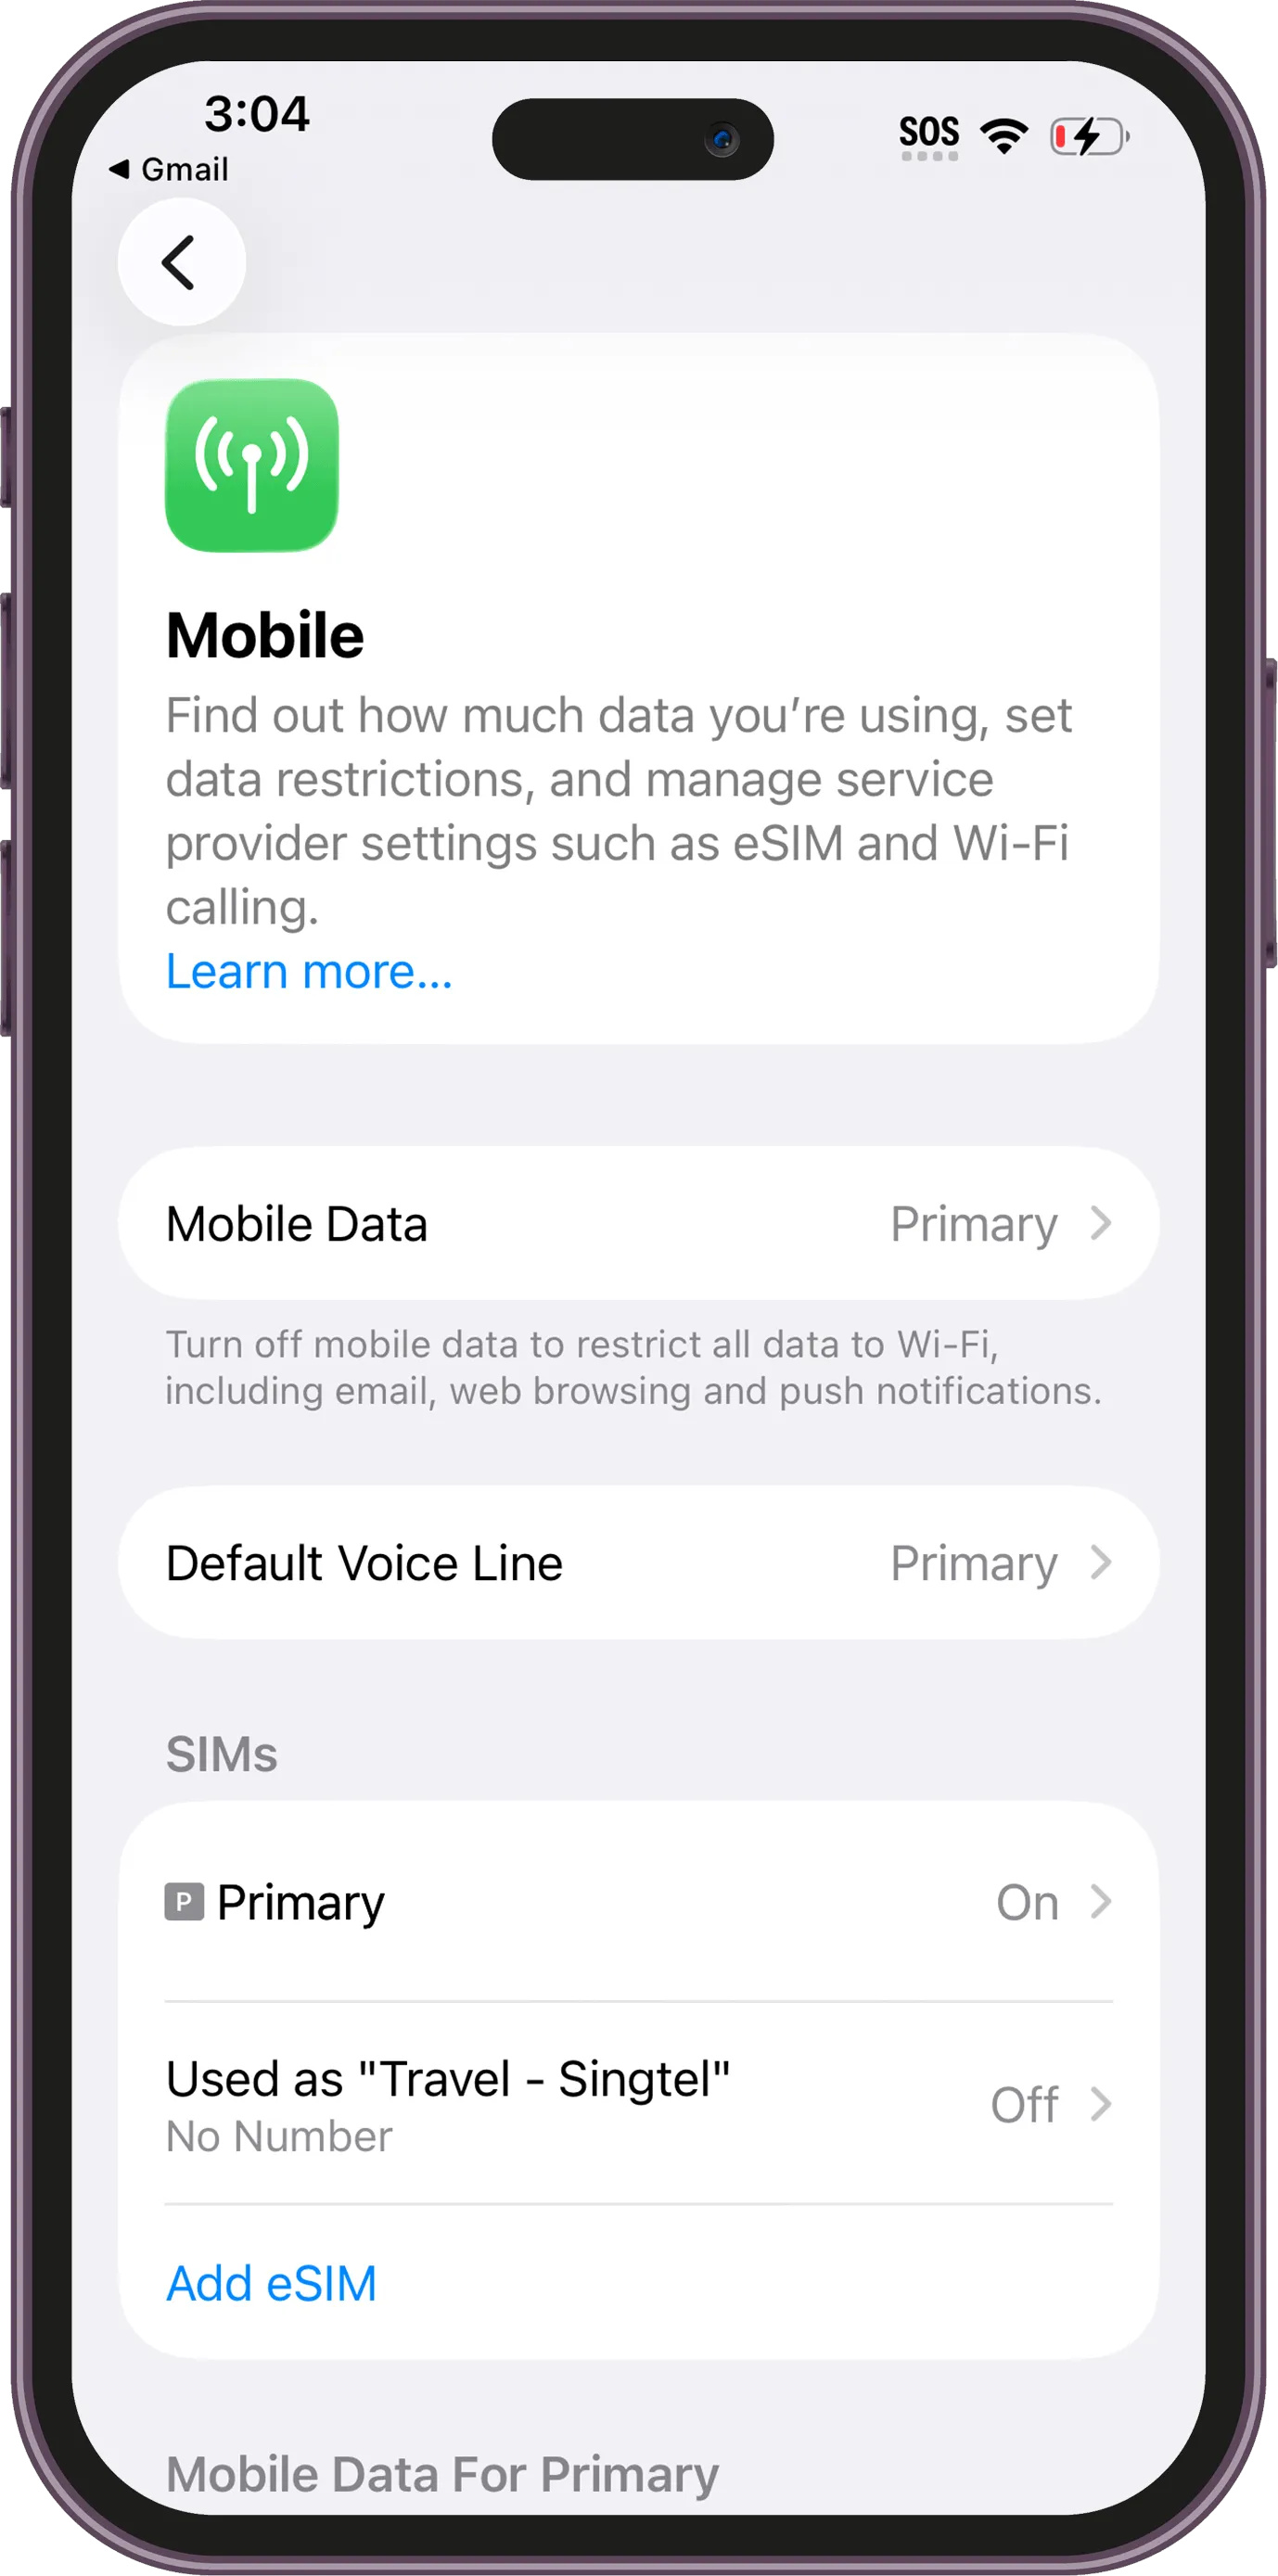
Step 9 / 16
In Settings > Mobile/Cellular, your new eSIM will appear in the SIMs list. Tap your new eSIM, here it's called "Travel - Singtel" (but yours might be different depending on the provider), to open its settings.
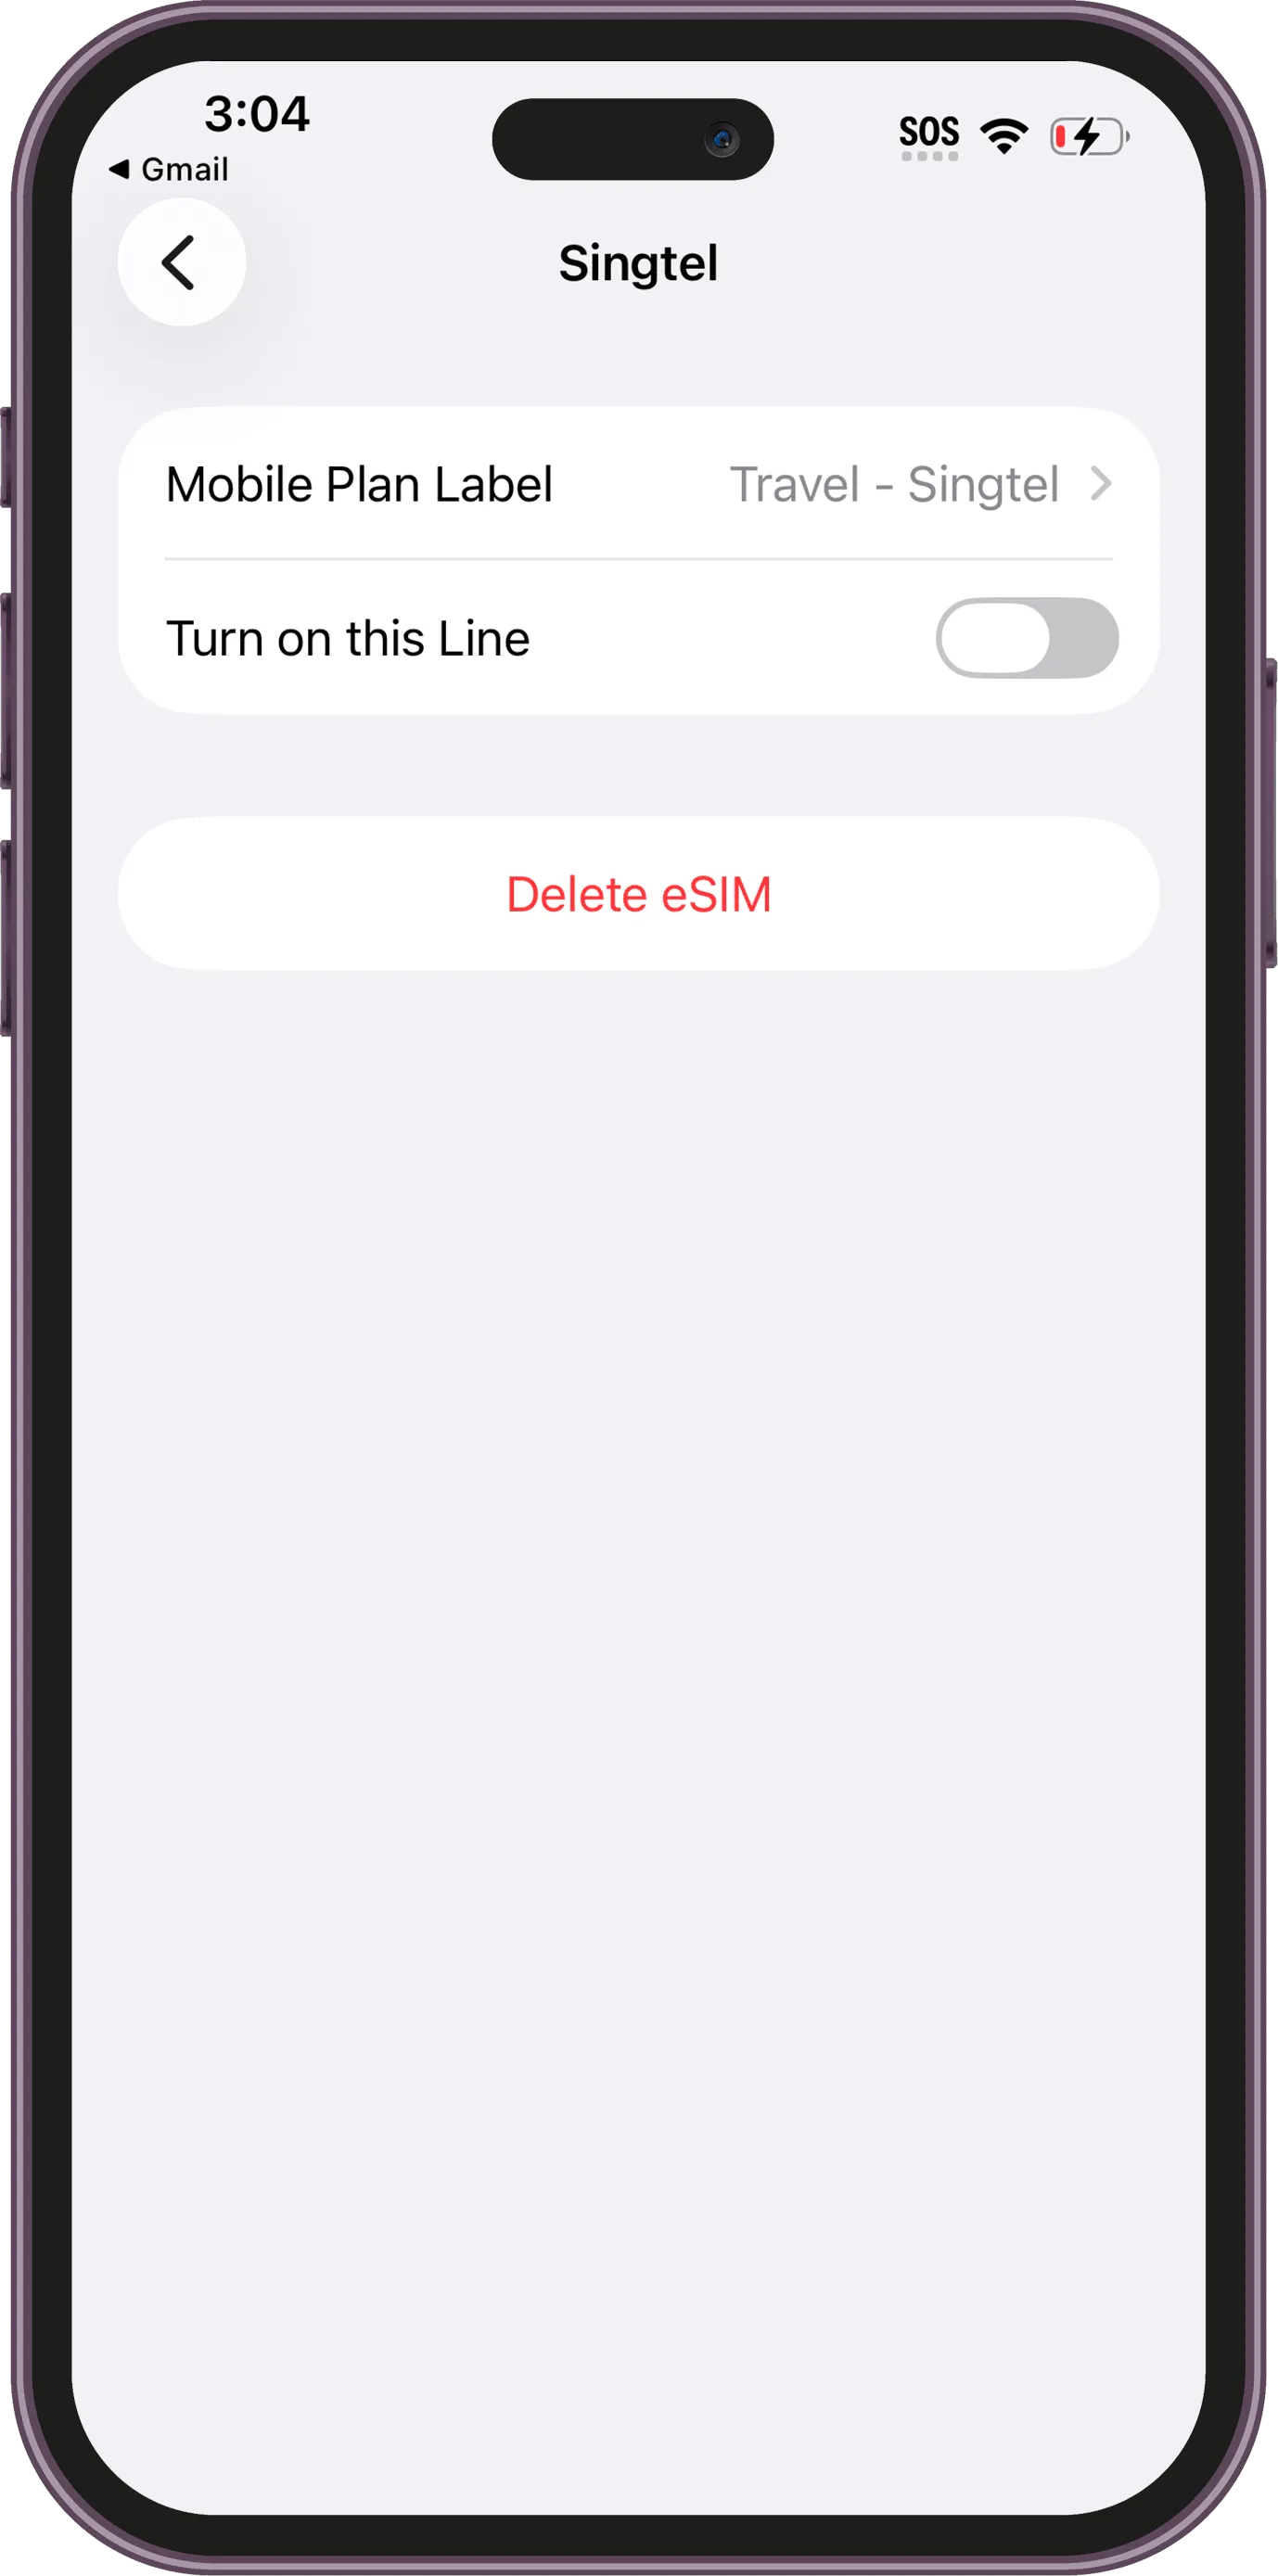
Step 10 / 16
Switch on Turn on this Line to enable the eSIM.
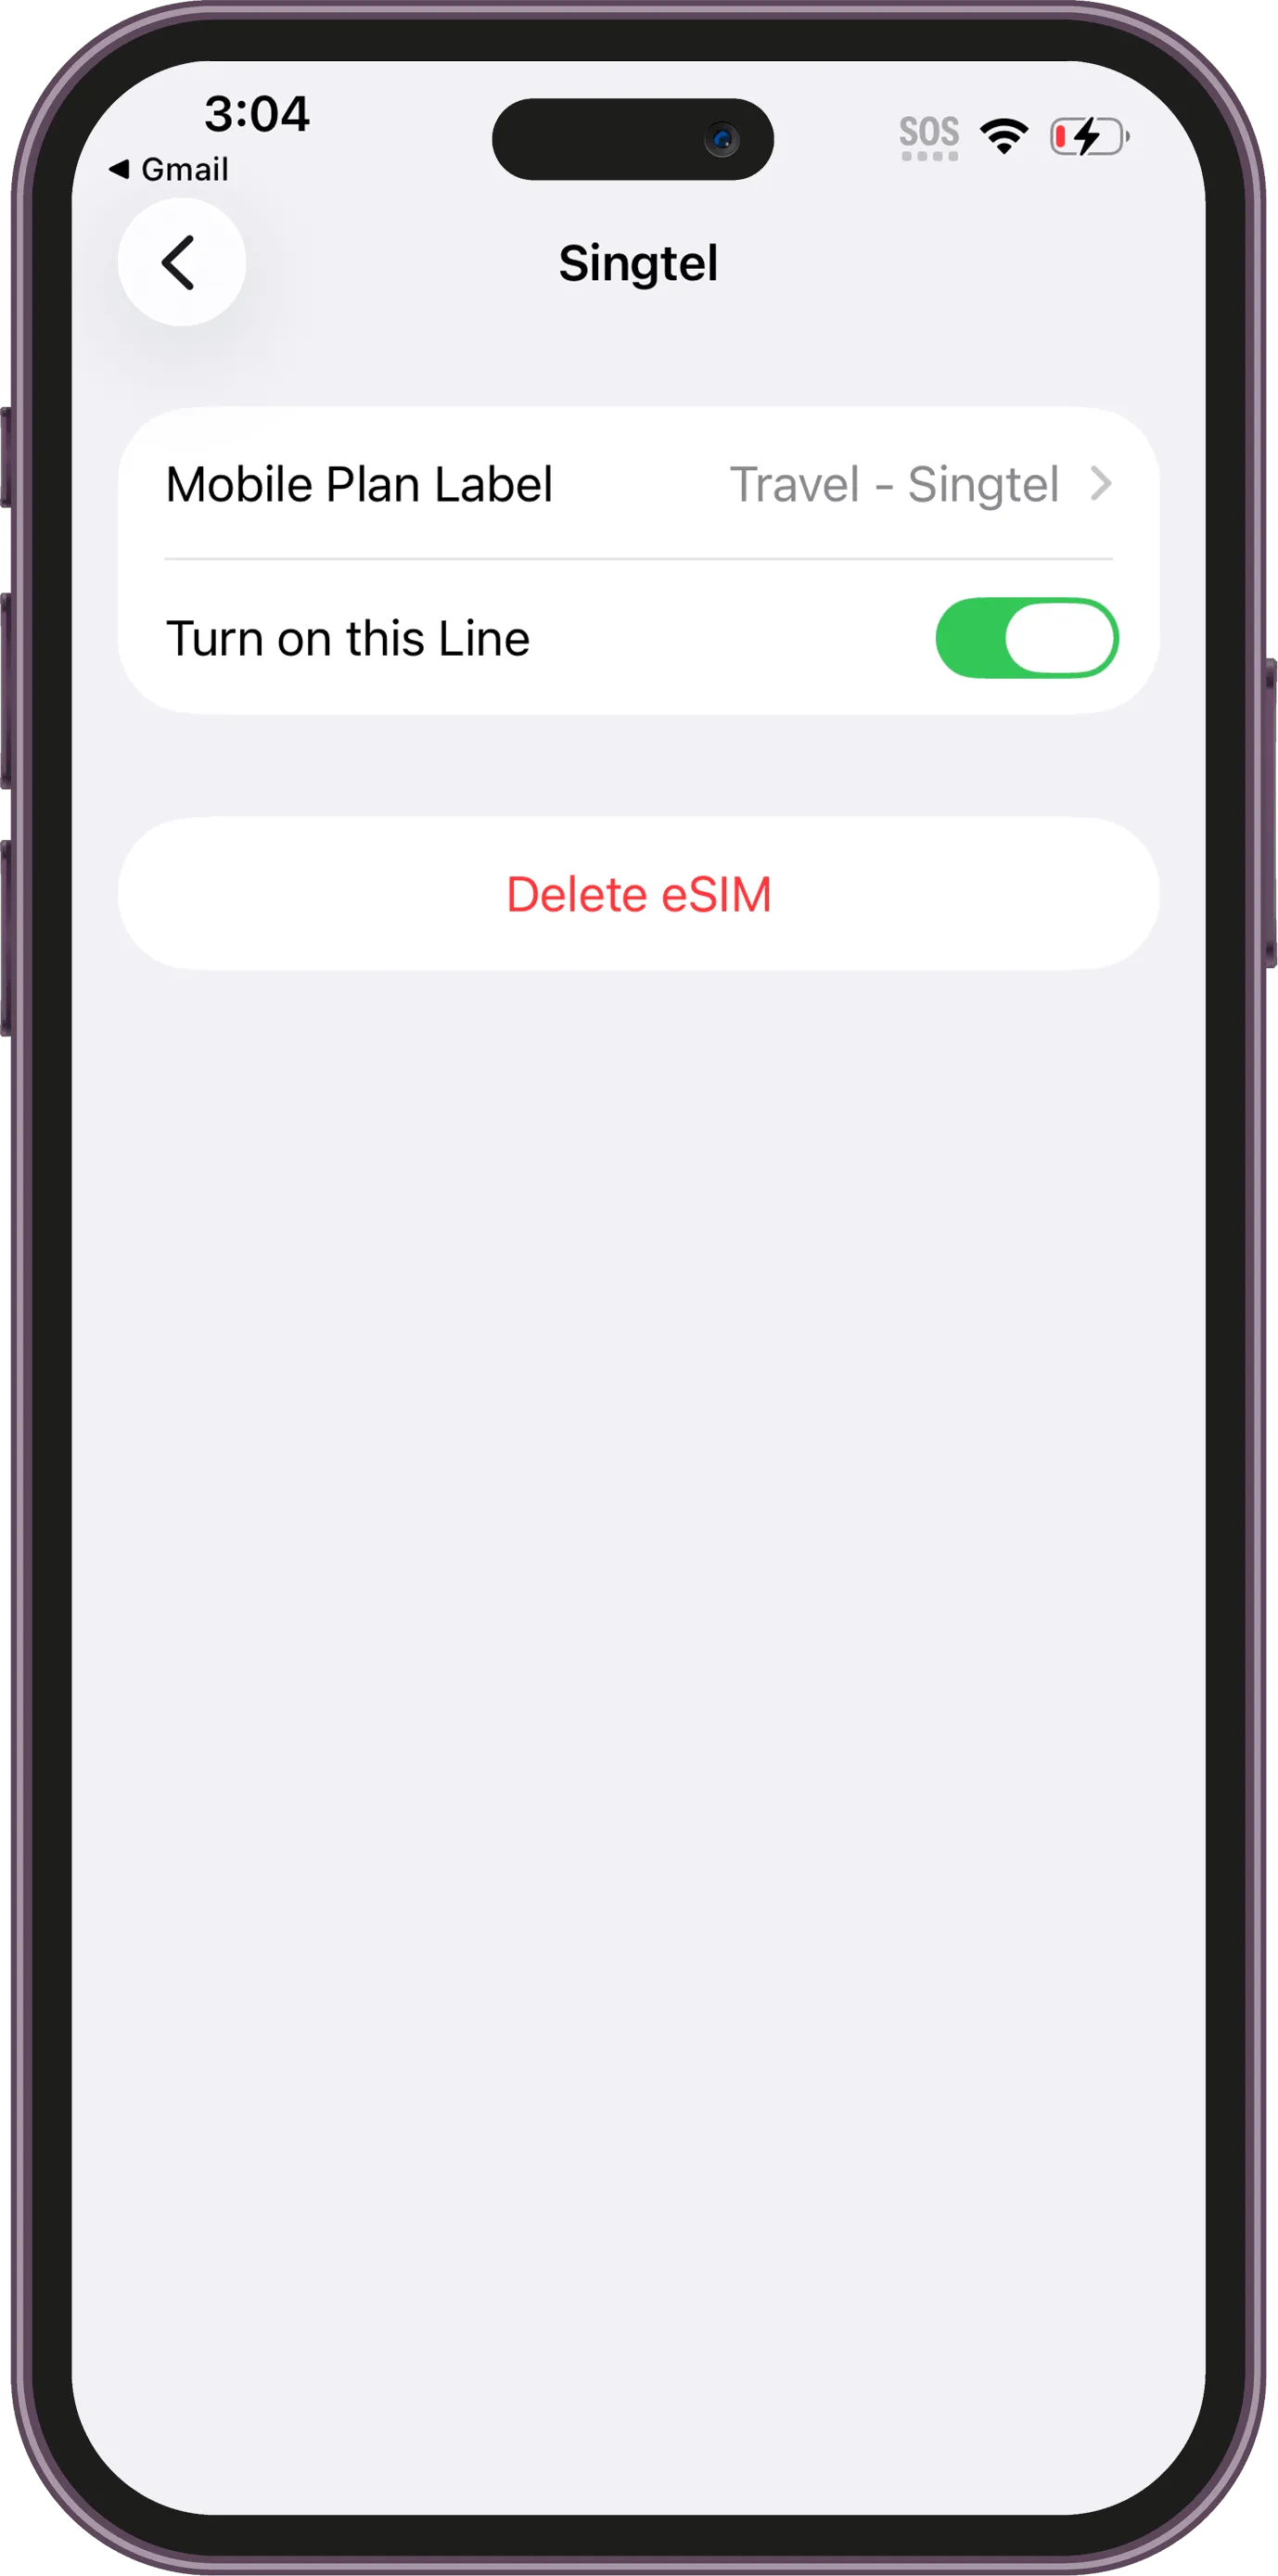
Step 11 / 16
Make sure Turn on this Line is enabled before continuing.
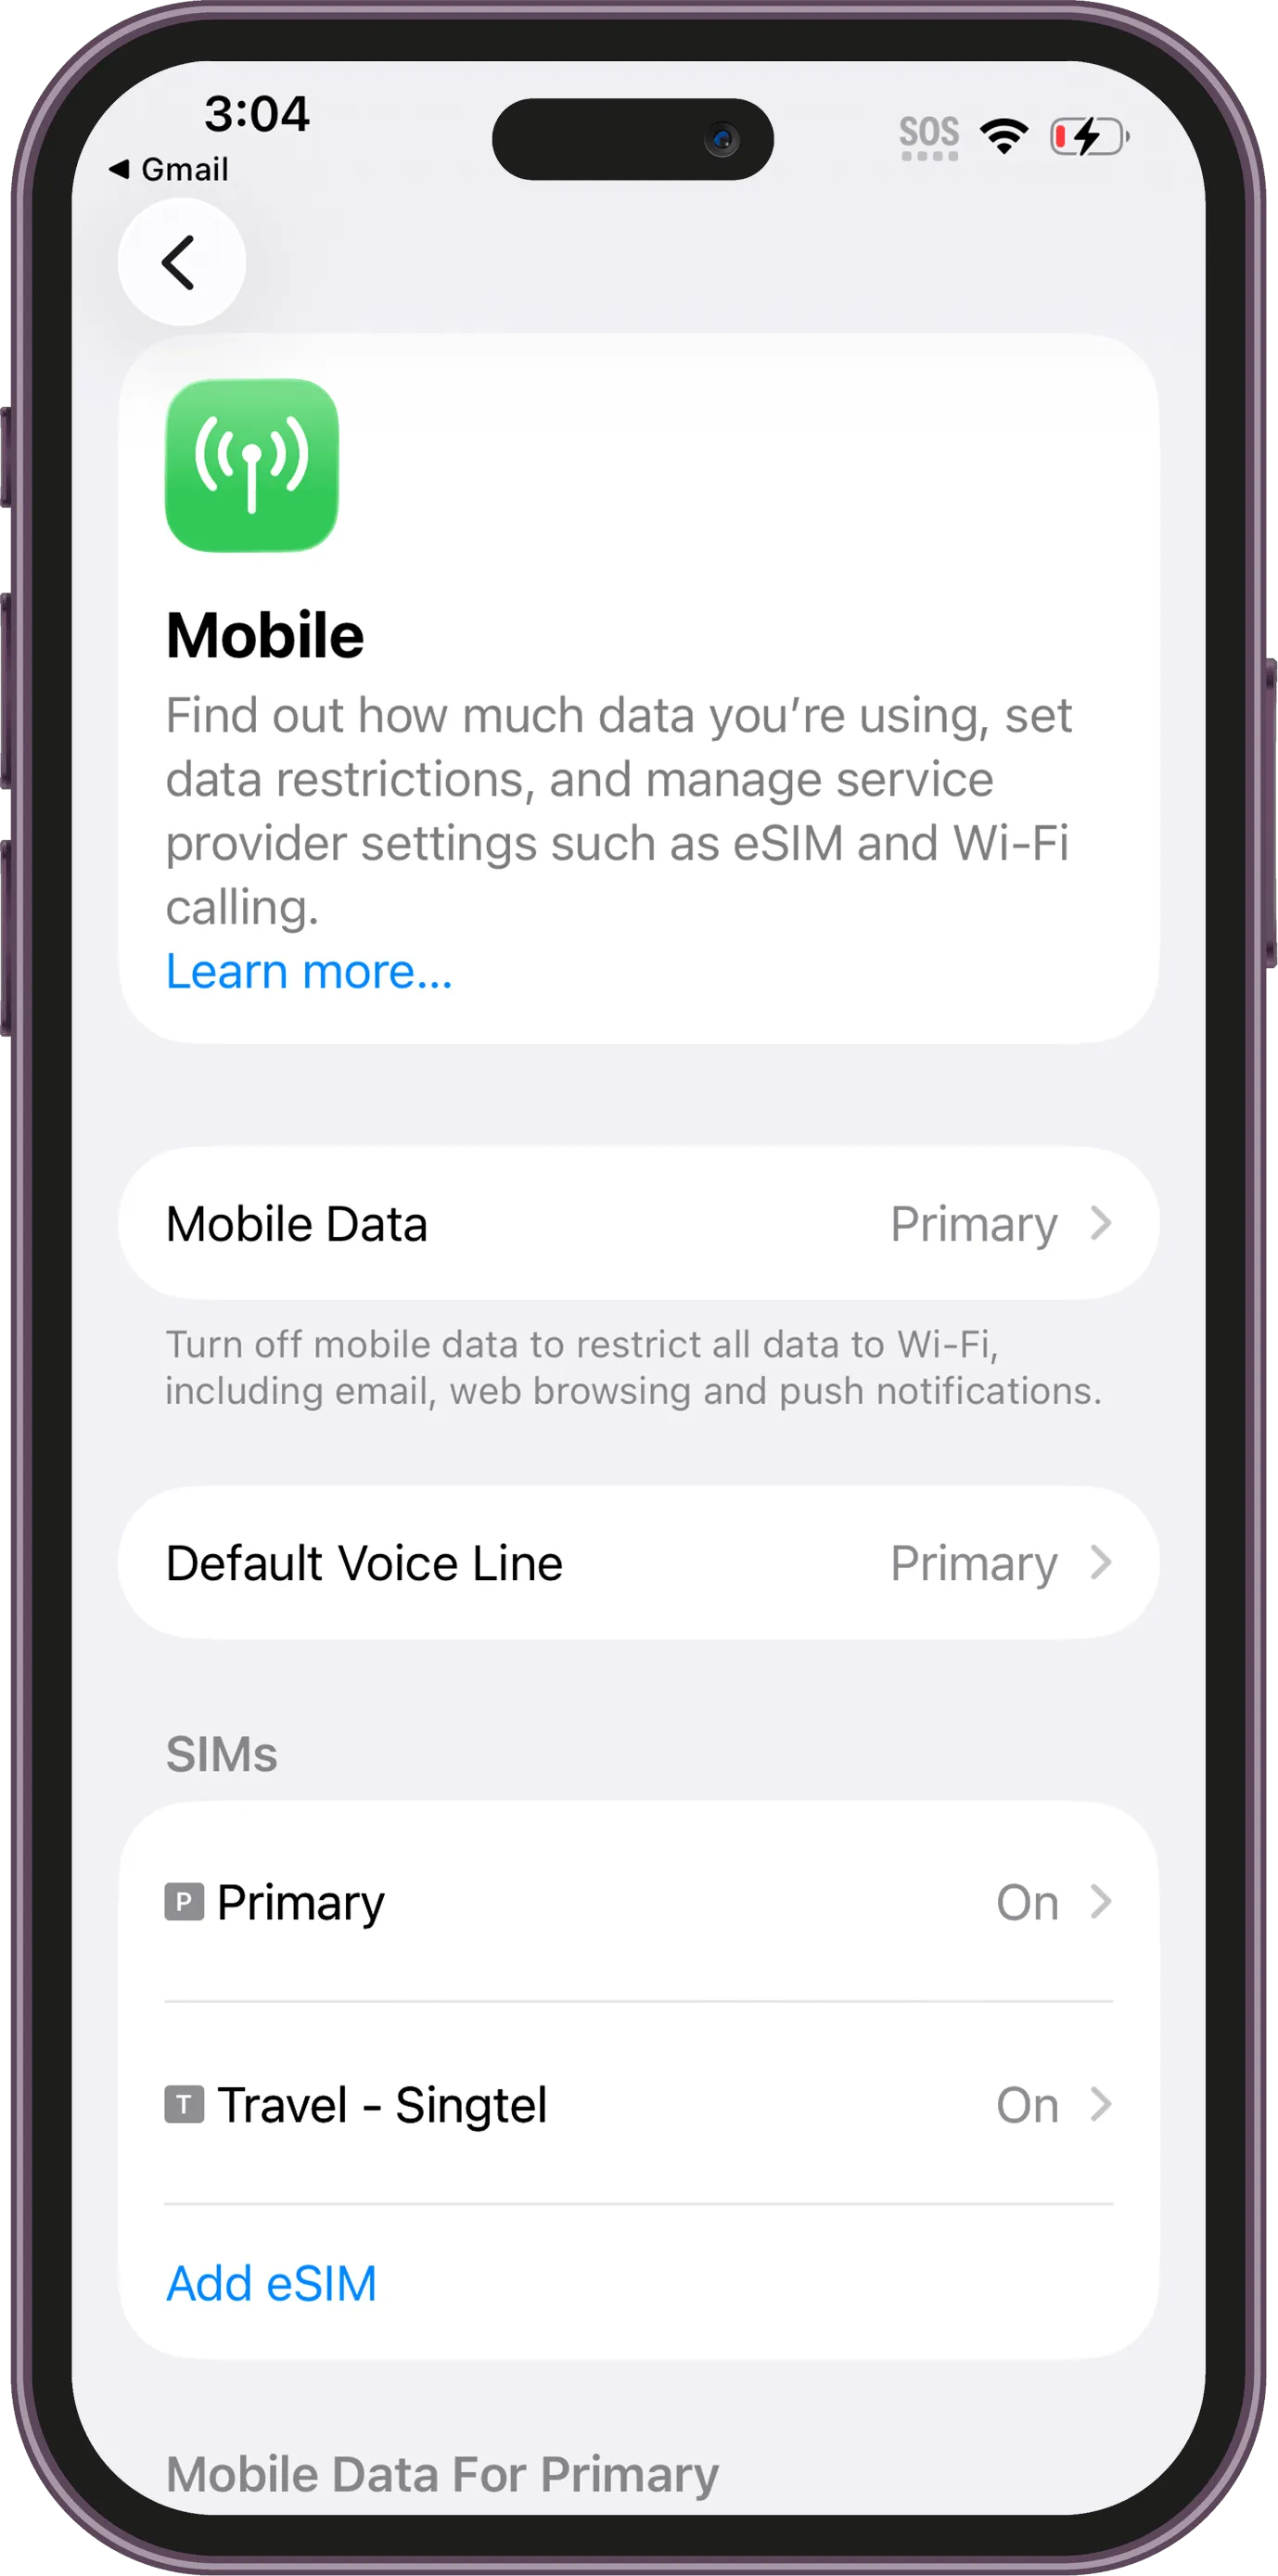
Step 12 / 16
Return to the Mobile screen and confirm both your primary SIM and travel eSIM are visible.
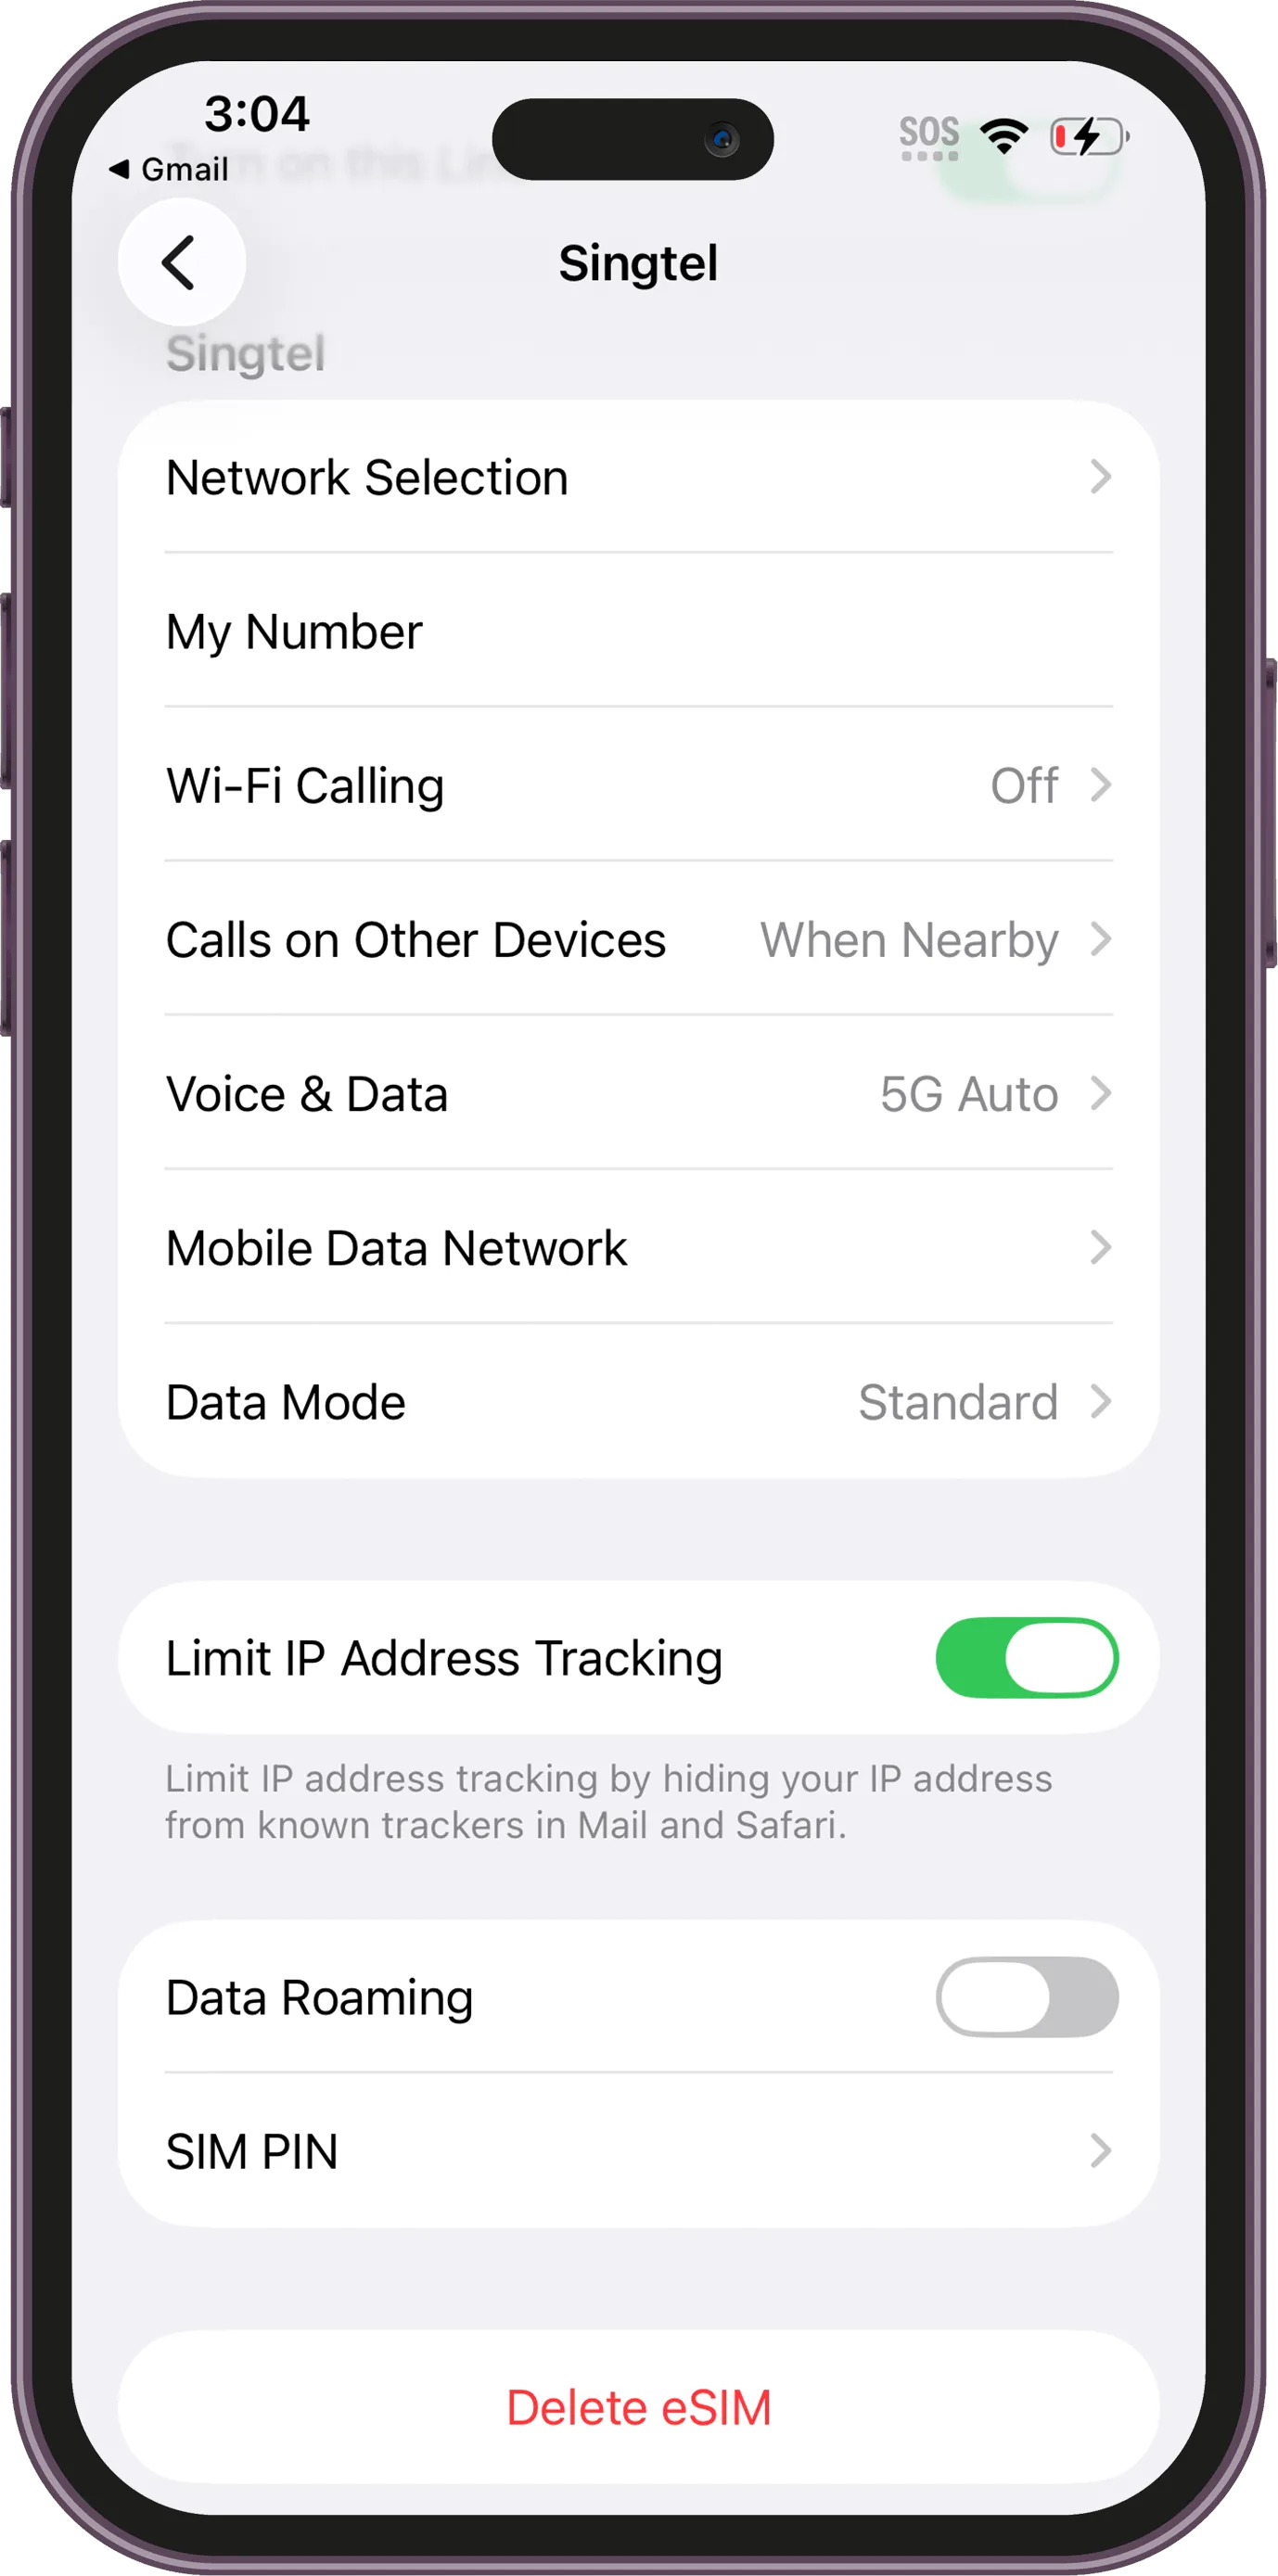
Step 13 / 16
Tap your eSIM name to manage the line settings.
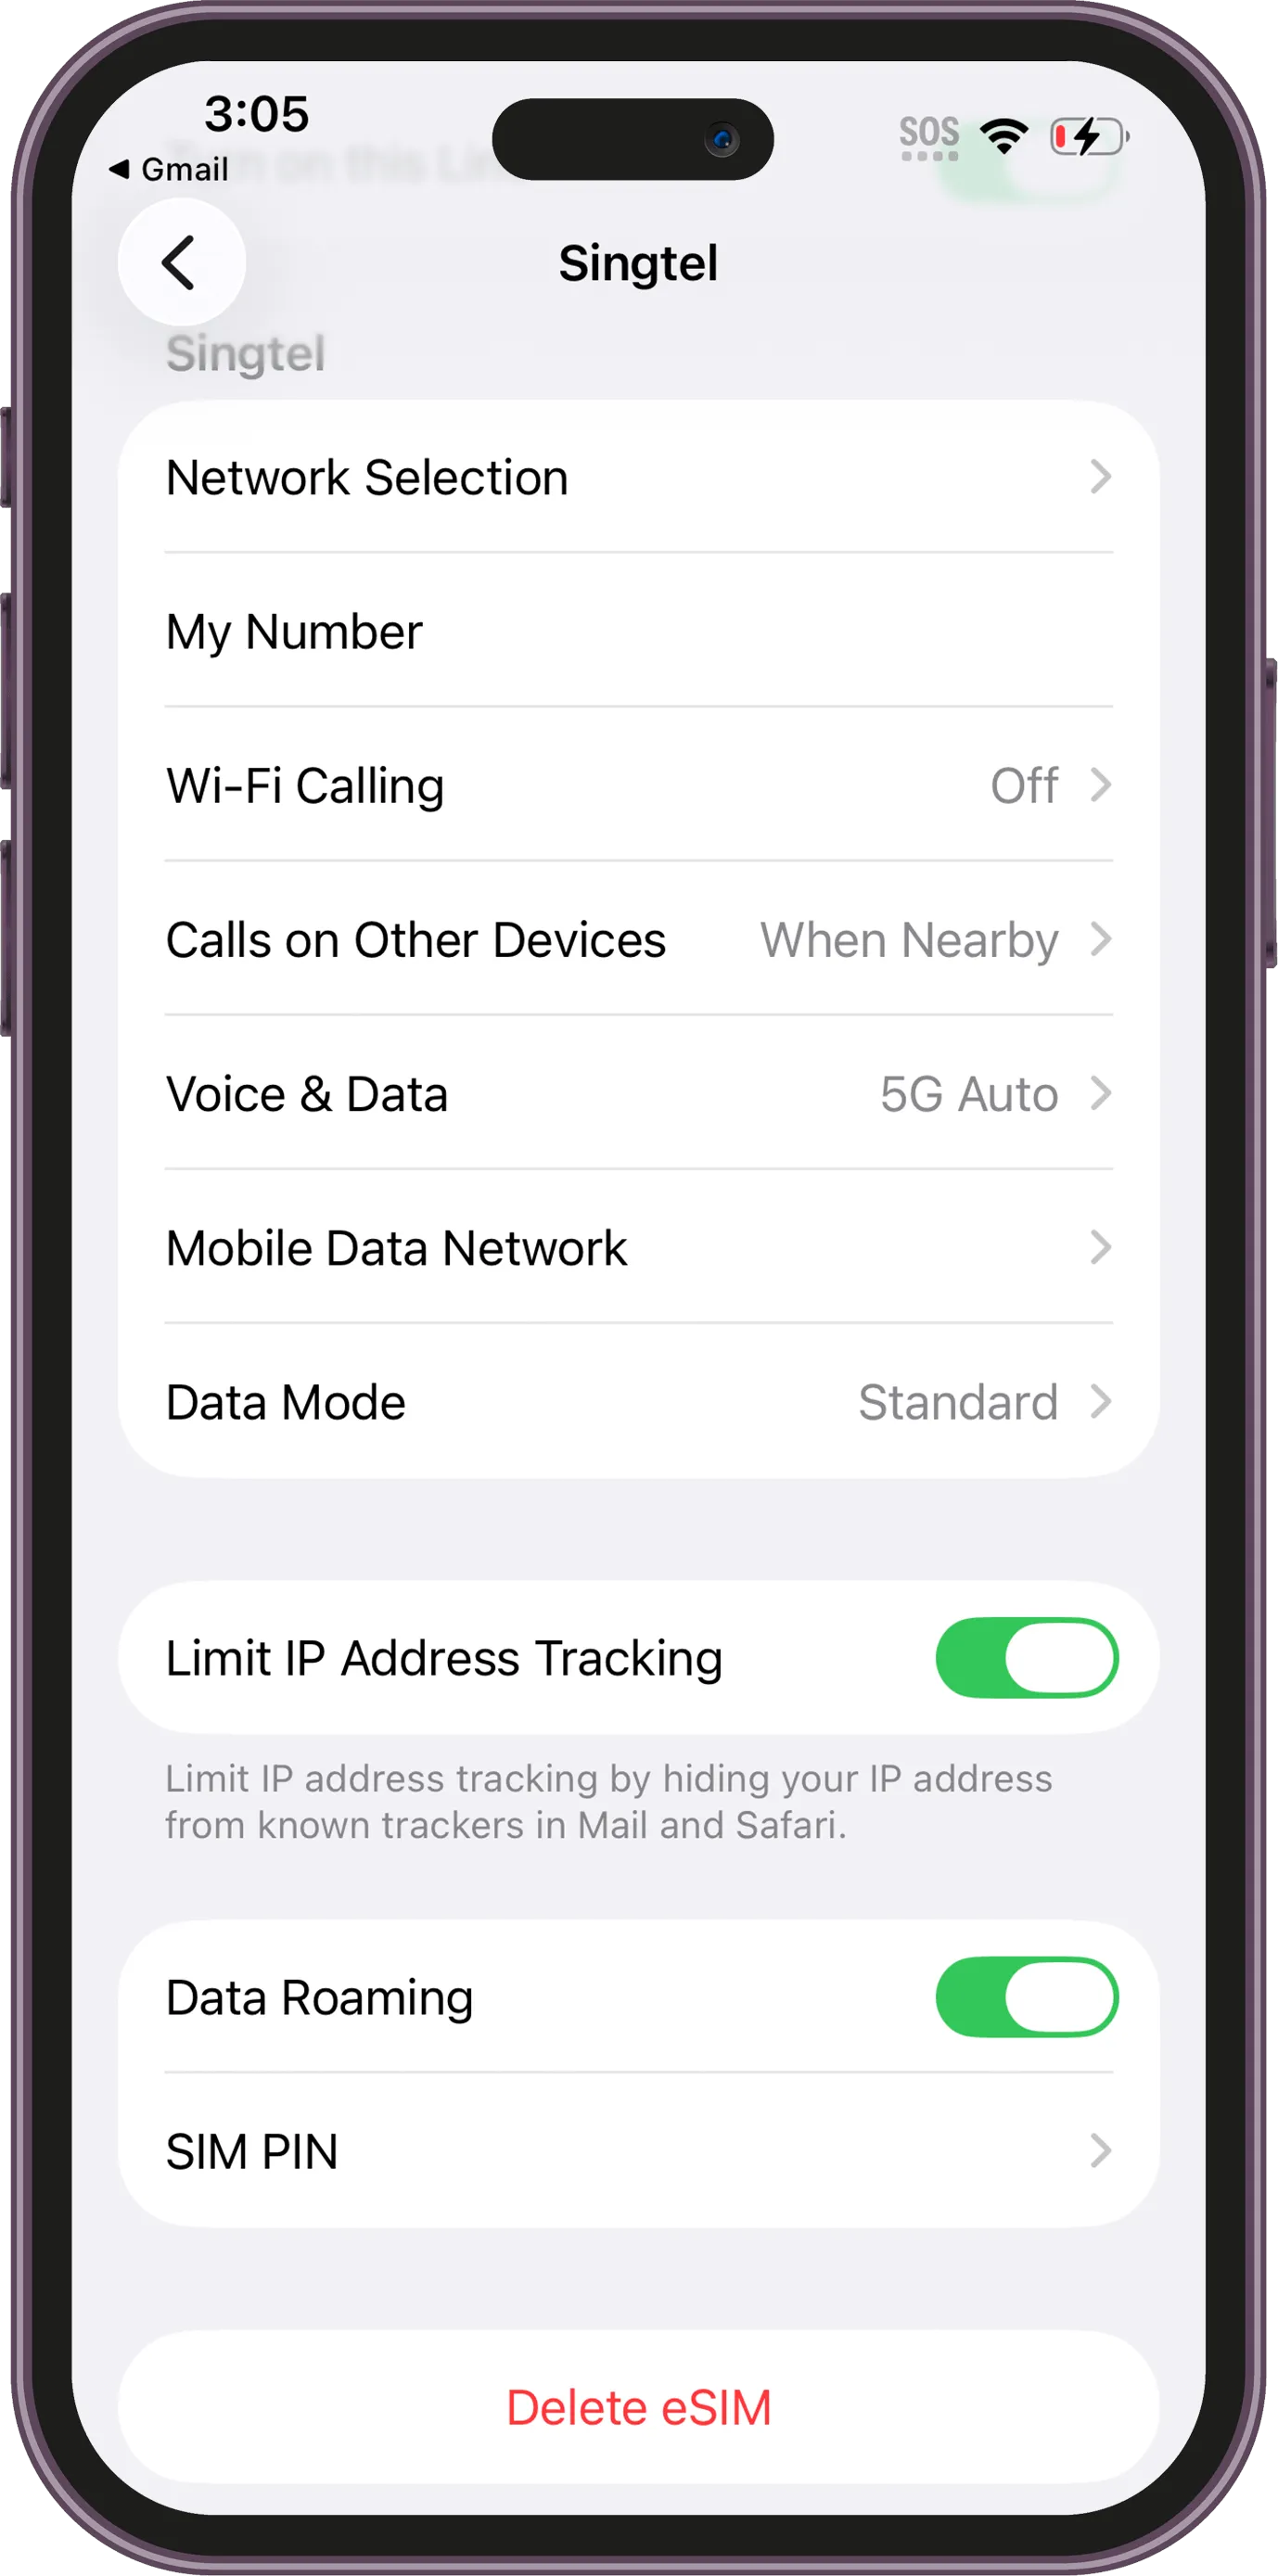
Step 14 / 16
Enable Data Roaming for the travel eSIM so it can connect overseas.
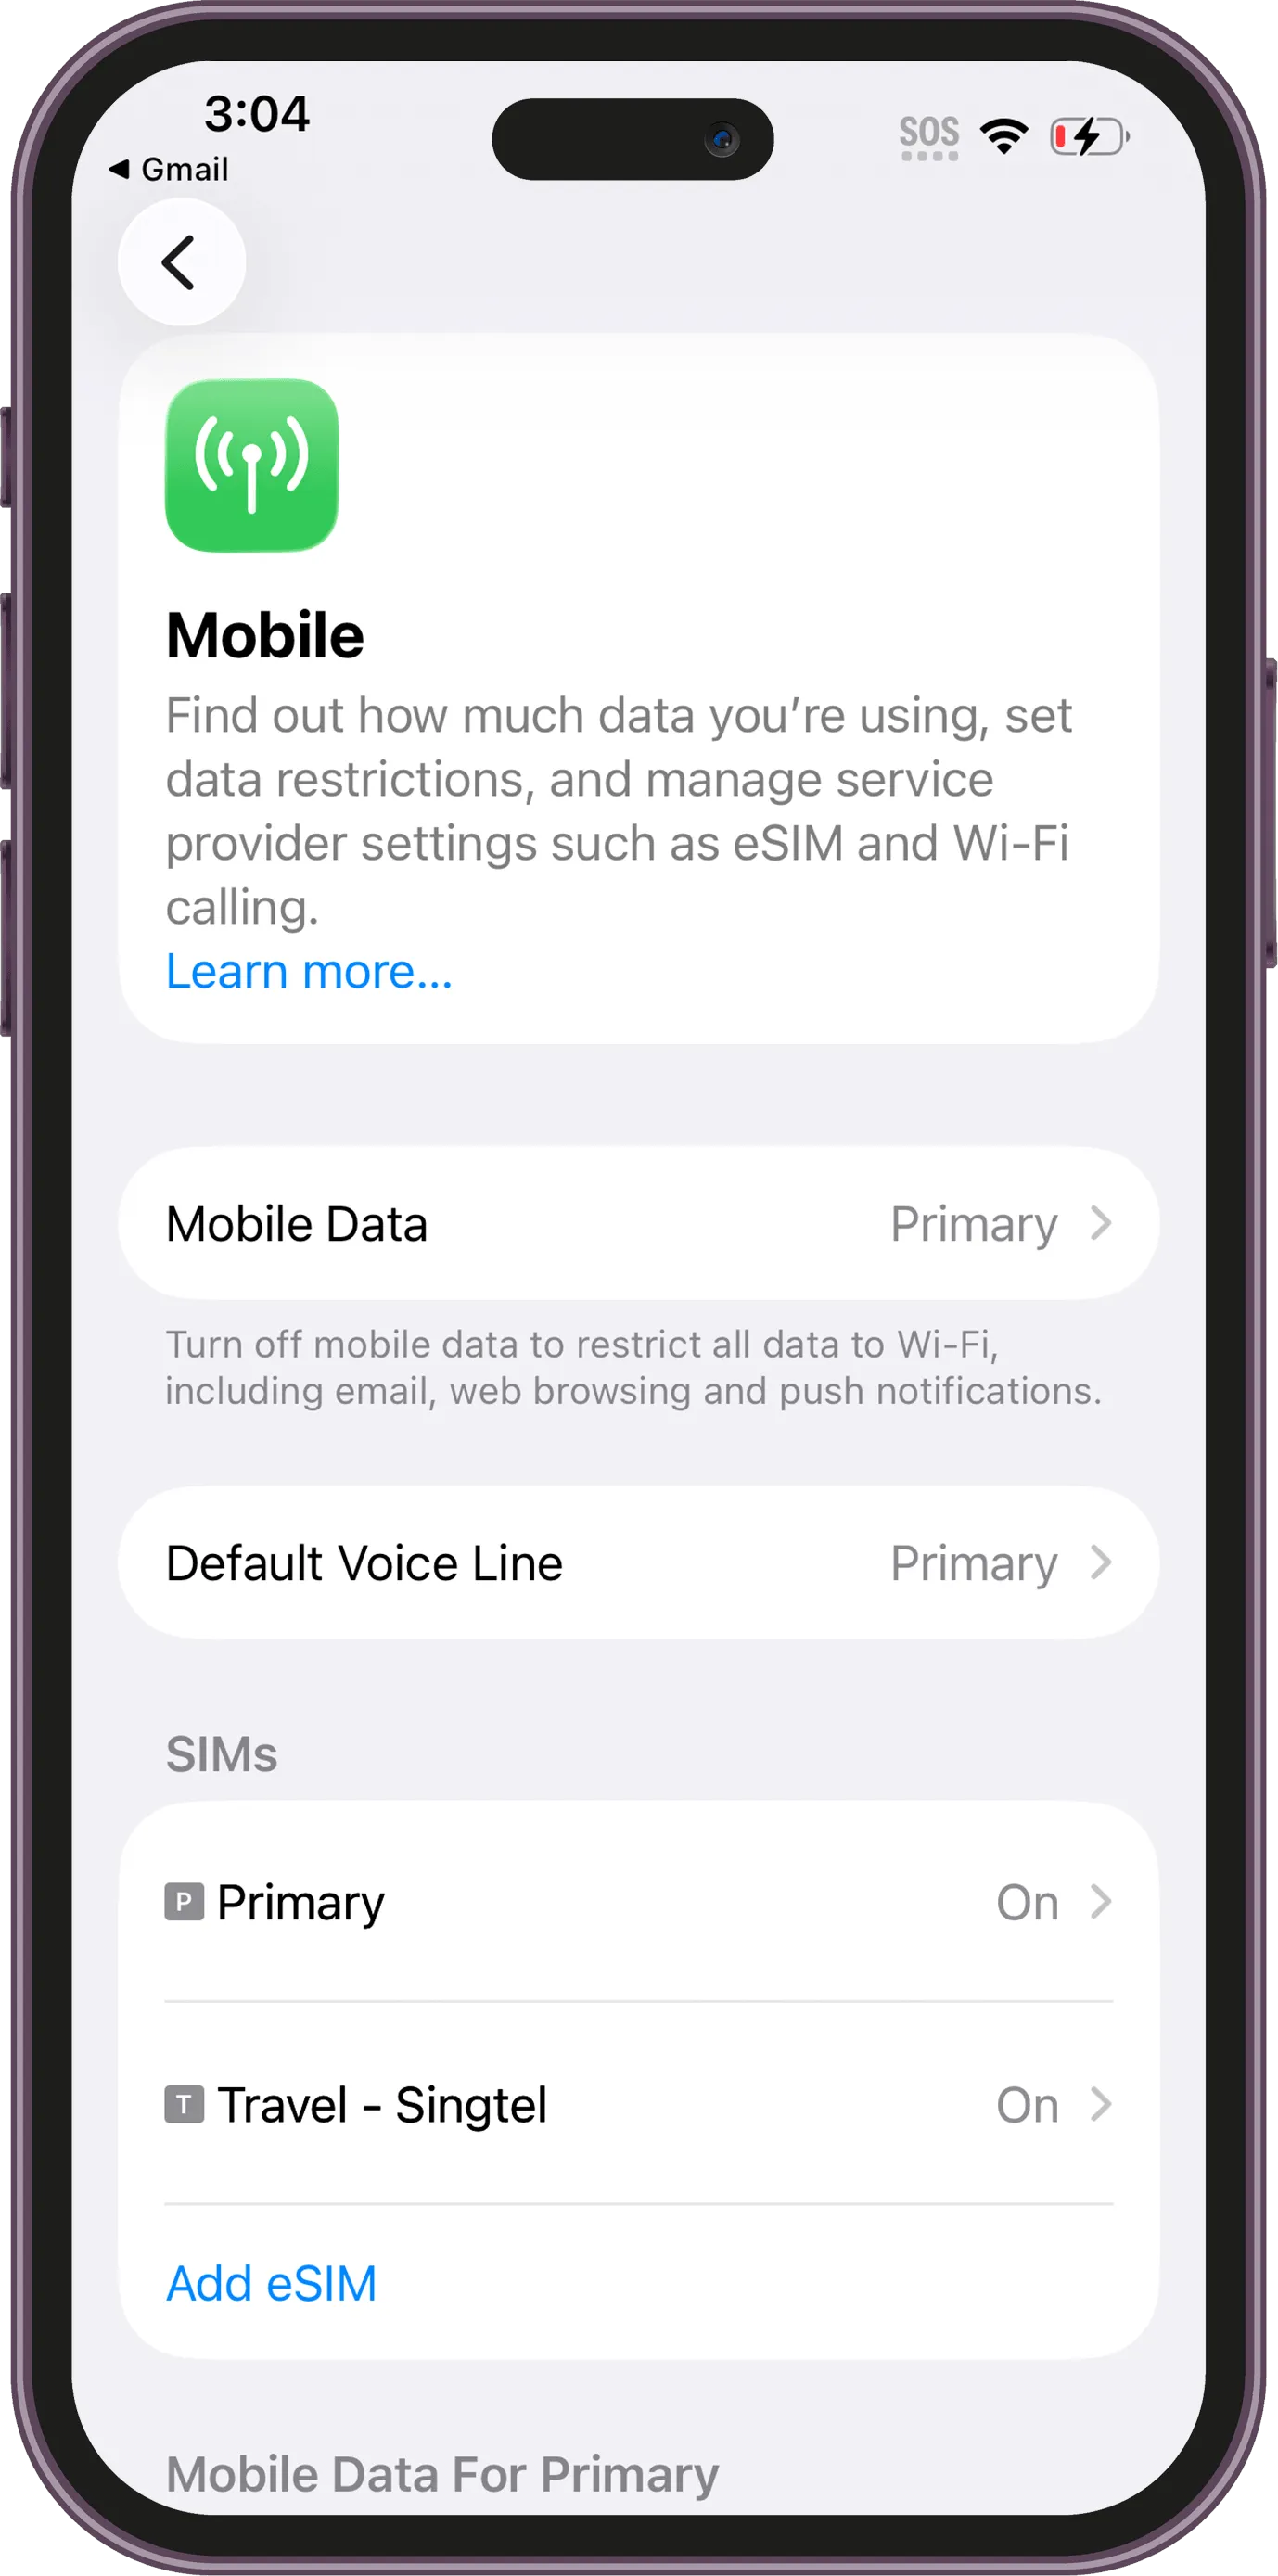
Step 15 / 16
Go back into the SIM list and then open Mobile Data / Cellular Data
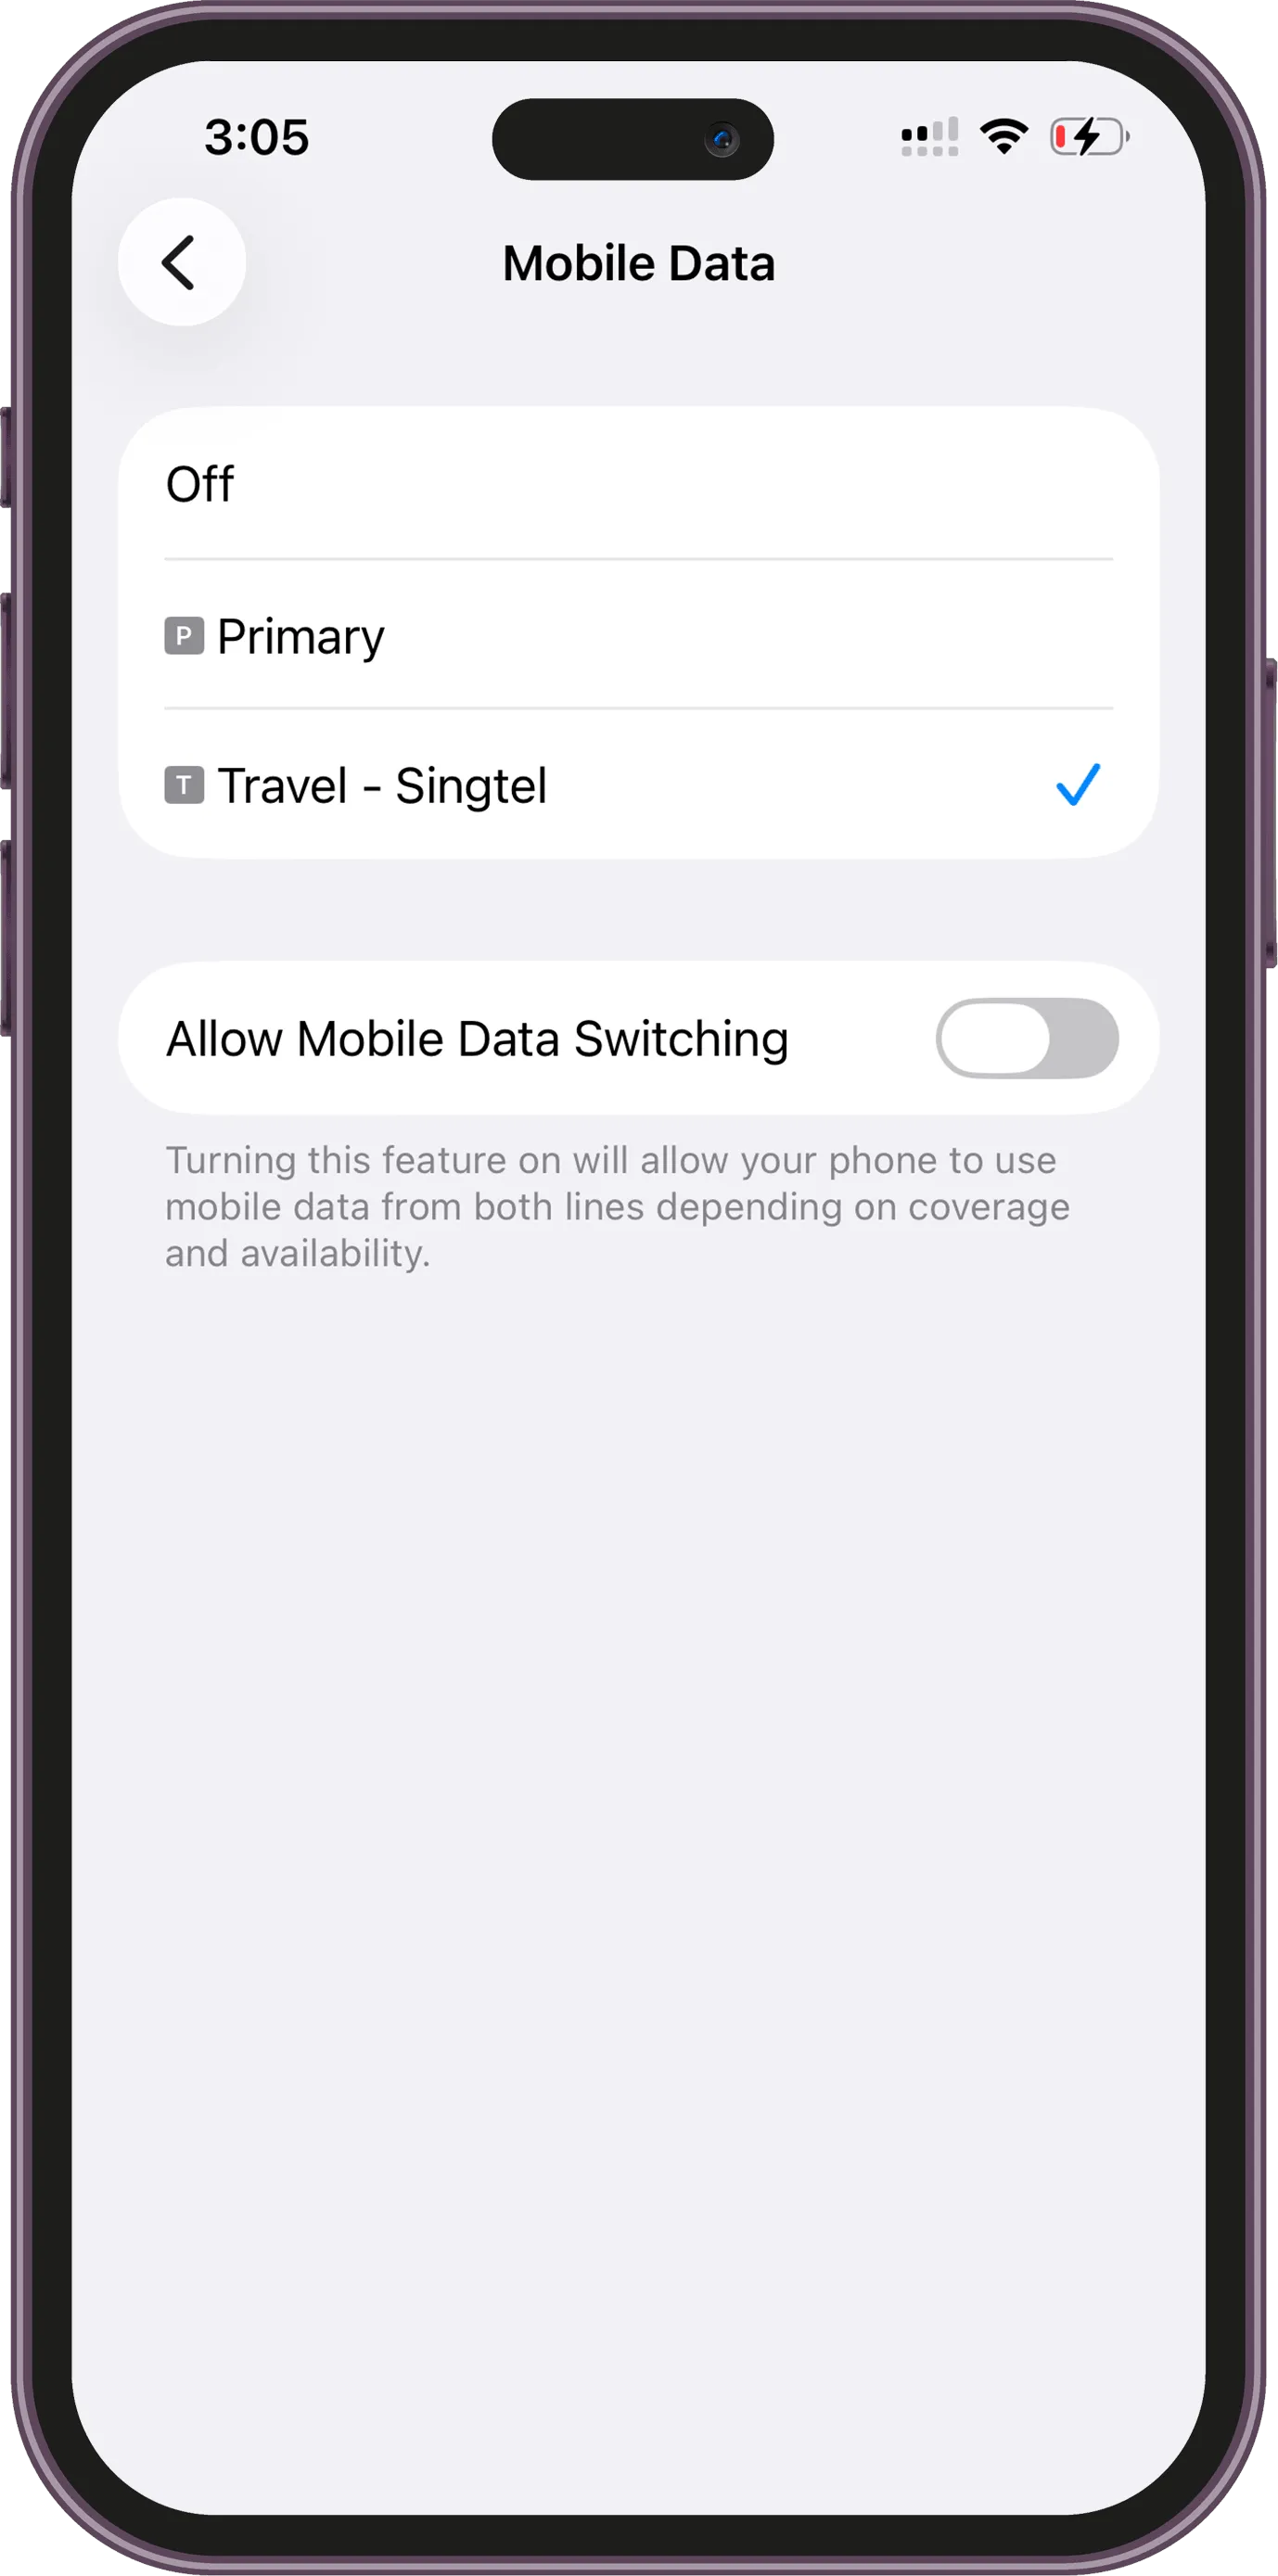
Step 16 / 16
In Mobile Data, choose your new eSIM as the line used for mobile data.