
iPhoneでeSIMを設定する
インストールしよう、 あなたのeSIM。
手順に沿ってインストールと有効化を行うだけ。10分ほどで完了し、専門知識は必要ありません。
ステップ 1 / 16
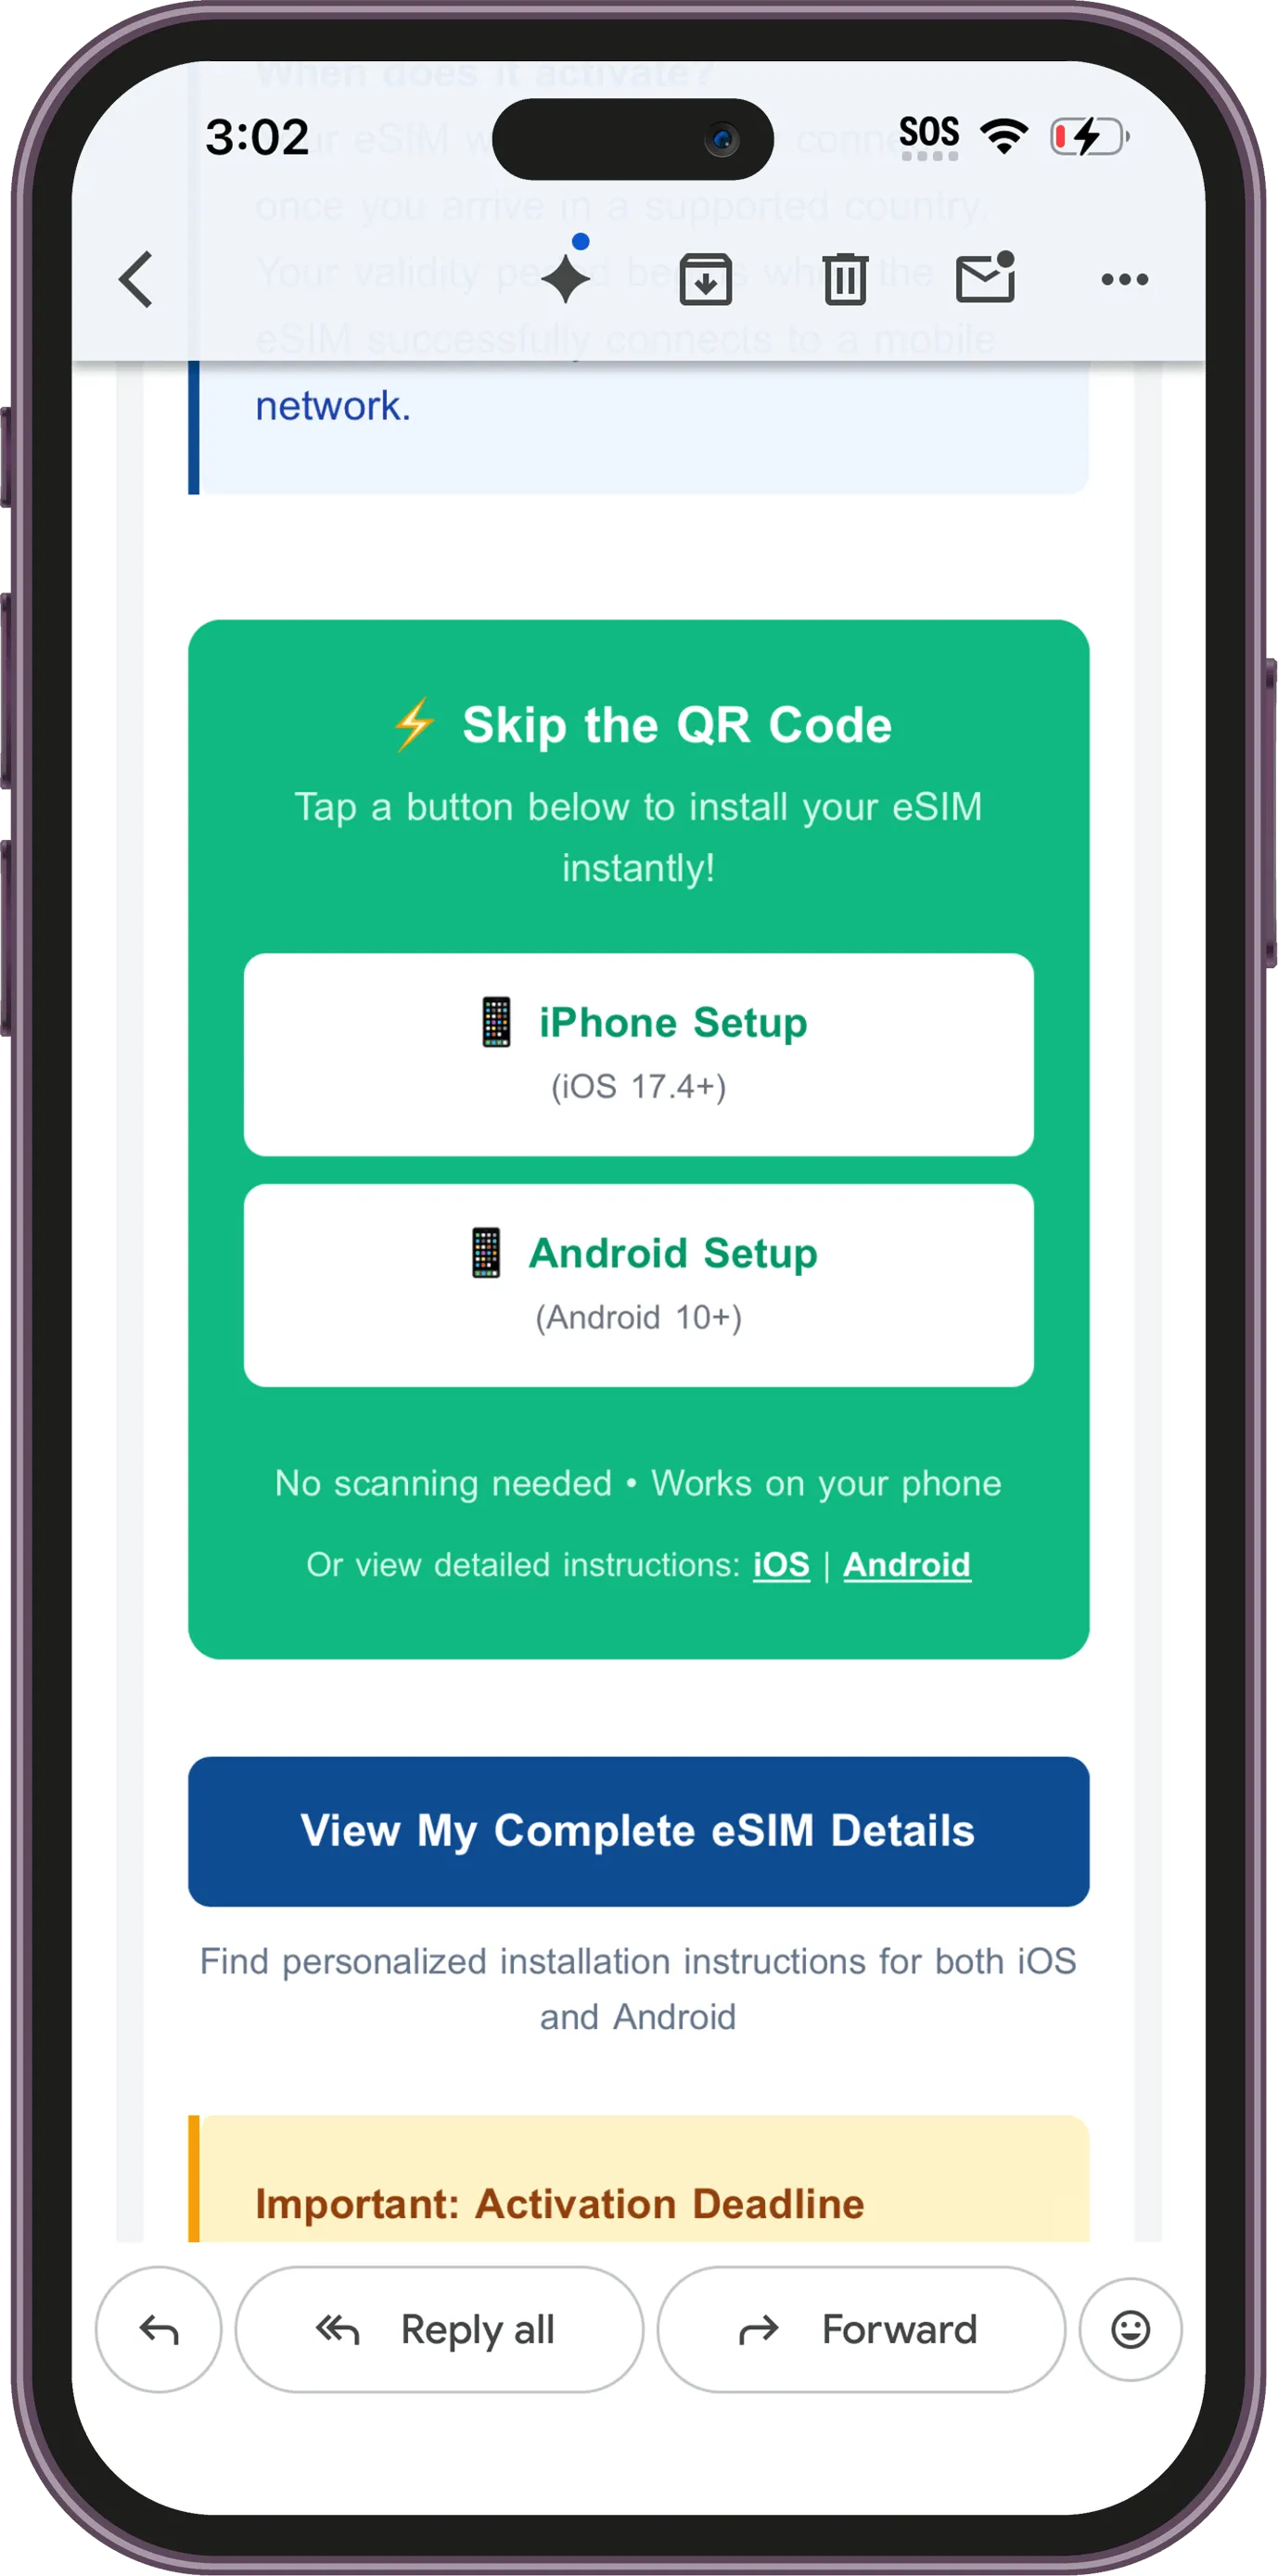
ステップ 1 / 16
Tap iPhone Setup
In the email, tap iPhone Setup under Skip the QR Code.
ヒント: 出発前に自宅のWi-Fiでインストールし、回線をオンにするのは現地に到着してからにしてください。
16 個のステップをすべて1ページで読む
- Tap iPhone Setup In the email, tap iPhone Setup under Skip the QR Code.
- Or Long Press the QR Code Alternatively, press and hold the QR code in the email and tap Add eSIM.
- Alternatively, press and hold the QR code in the email to open more options. When the Activate Your eSIM prompt appears, tap Activate to begin setup.
- Wait While It Connects Your iPhone will connect to the service provider. This may take a few minutes.
- Continue eSIM Setup Once your new eSIM is ready, tap Continue.
- Activation Begins You may have to wait a moment while the eSIM installs on your device *Note - Activation of your plan may not begin from this moment, refer to your plan details for when this occurs
- Choose Data Only Select Data Only for your travel eSIM plan.
- Setup Complete Your travel eSIM has been added successfully. Tap Done to finish setup.
- Find Your New eSIM In Settings > Mobile/Cellular, your new eSIM will appear in the SIMs list. Tap your new eSIM, here it's called "Travel - Singtel" (but yours might be different depending on the provider), to open its settings.
- Turn On This Line Switch on Turn on this Line to enable the eSIM.
- Confirm the eSIM Is On Make sure Turn on this Line is enabled before continuing.
- Check Both SIMs Return to the Mobile screen and confirm both your primary SIM and travel eSIM are visible.
- Open Travel eSIM Settings Again Tap your eSIM name to manage the line settings.
- Turn On Data Roaming Enable Data Roaming for the travel eSIM so it can connect overseas.
- Open Mobile Data Go back into the SIM list and then open Mobile Data / Cellular Data
- Select the eSIM for Mobile Data In Mobile Data, choose your new eSIM as the line used for mobile data.